NAS & Backup / Practical guide
How to Automate FortiGate Configuration Backups to Remote Storage
Automate FortiGate configuration backups to remote FTP storage using Automation Stitches, with QNAP as the example destination and practical security and recovery notes.
Introduction
A FortiGate firewall can become one of the most critical devices in a home or business network. Once you have firewall policies, VPNs, routing, address objects, security profiles, and other settings in place, losing the configuration can turn a hardware failure or bad change into a much bigger problem.
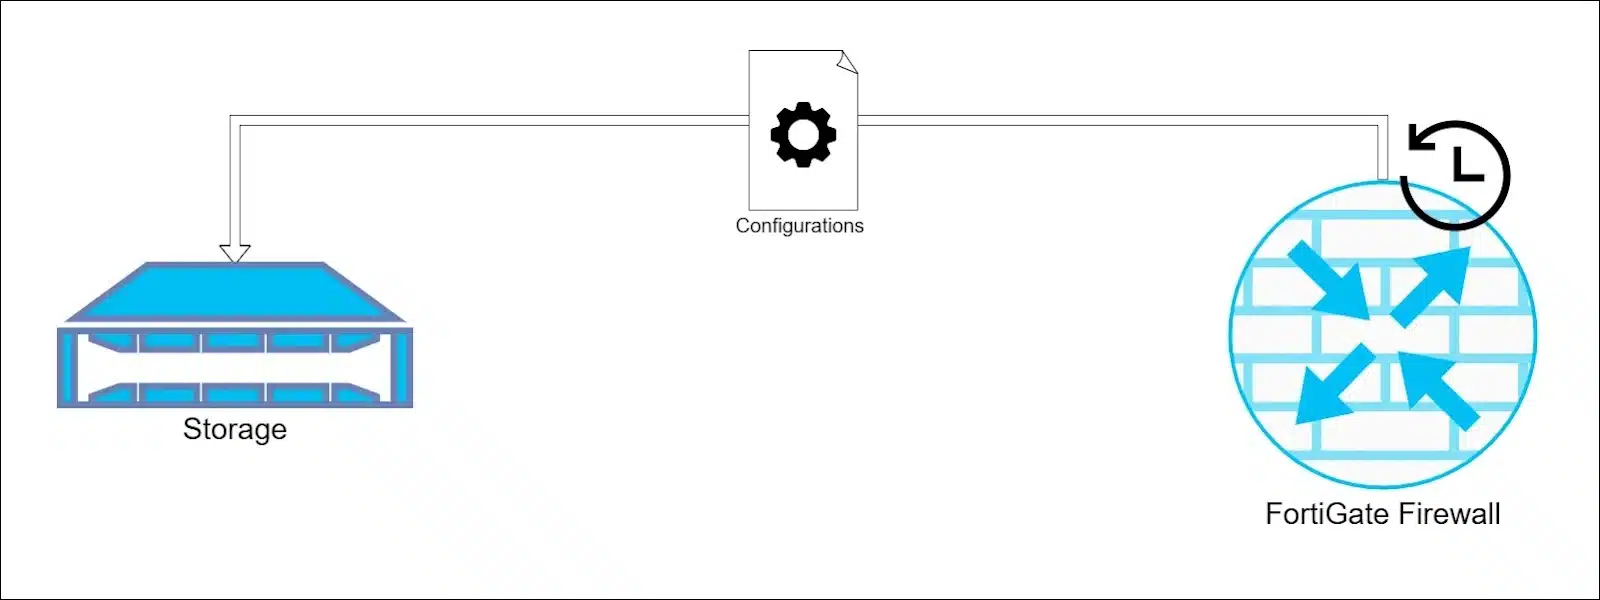
That is why I prefer automating FortiGate configuration backups instead of depending only on manual exports. In this guide, I’ll use a QNAP NAS as the remote storage and an Automation Stitch to send the configuration to an FTP server on a schedule.
Security note: this guide uses FTP because that is the setup I tested and the screenshots below are based on it. Plain FTP does not encrypt the connection, so I would keep it inside a trusted local network or across a VPN. If the backup has to cross an untrusted network, SFTP is the better option. FortiOS supports both FTP and SFTP configuration backups.
Why Automate FortiGate Configuration Backups?
Manual configuration backups are easy to forget, especially after a firewall has been stable for months. An automated job gives you a predictable recovery copy after normal configuration changes, upgrades, or hardware problems.
I still recommend taking a manual backup before a major change. The scheduled backup is the safety net that keeps running even when nobody remembers to export the configuration manually.
What Do You Need?
You need administrator access to the FortiGate and a remote FTP server that the firewall can reach. The FTP destination can be a NAS, Linux server, Windows server, or another storage system.
In this guide I’m using a QNAP NAS. You also need a dedicated FTP account with write permission to the backup folder. Avoid using a normal administrator account when a restricted backup account is enough.
Let’s Set Up the FortiGate Backup
Step 1 – Prepare the FTP Storage
First, prepare the remote storage and enable its FTP service. In this example, the destination is a QNAP NAS.
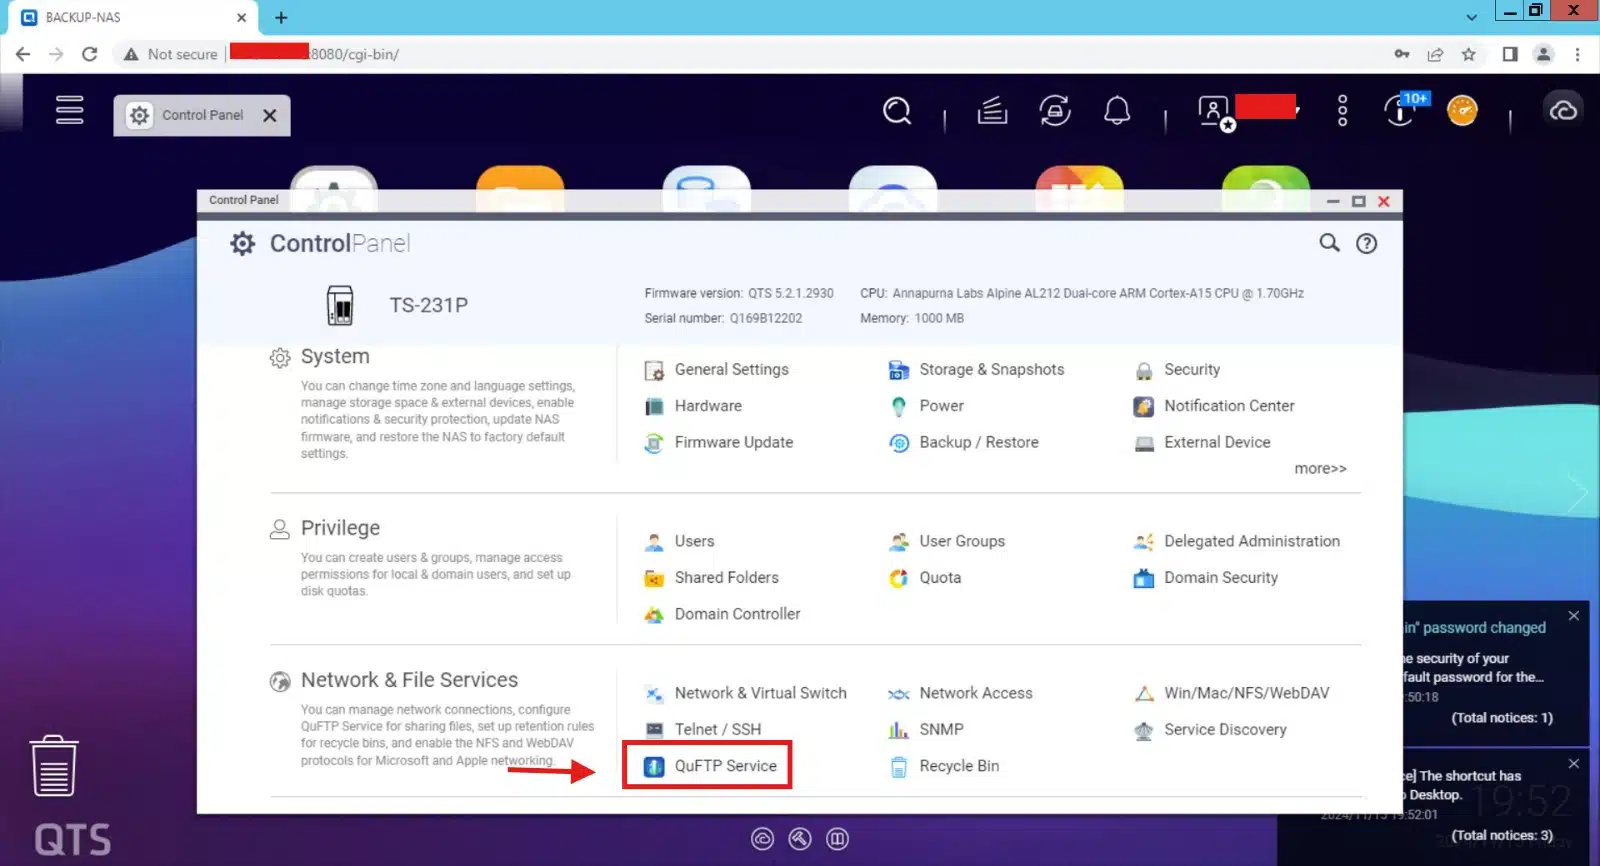
Log in to the NAS web portal and open the FTP service settings:
Then make sure the FTP server is enabled:
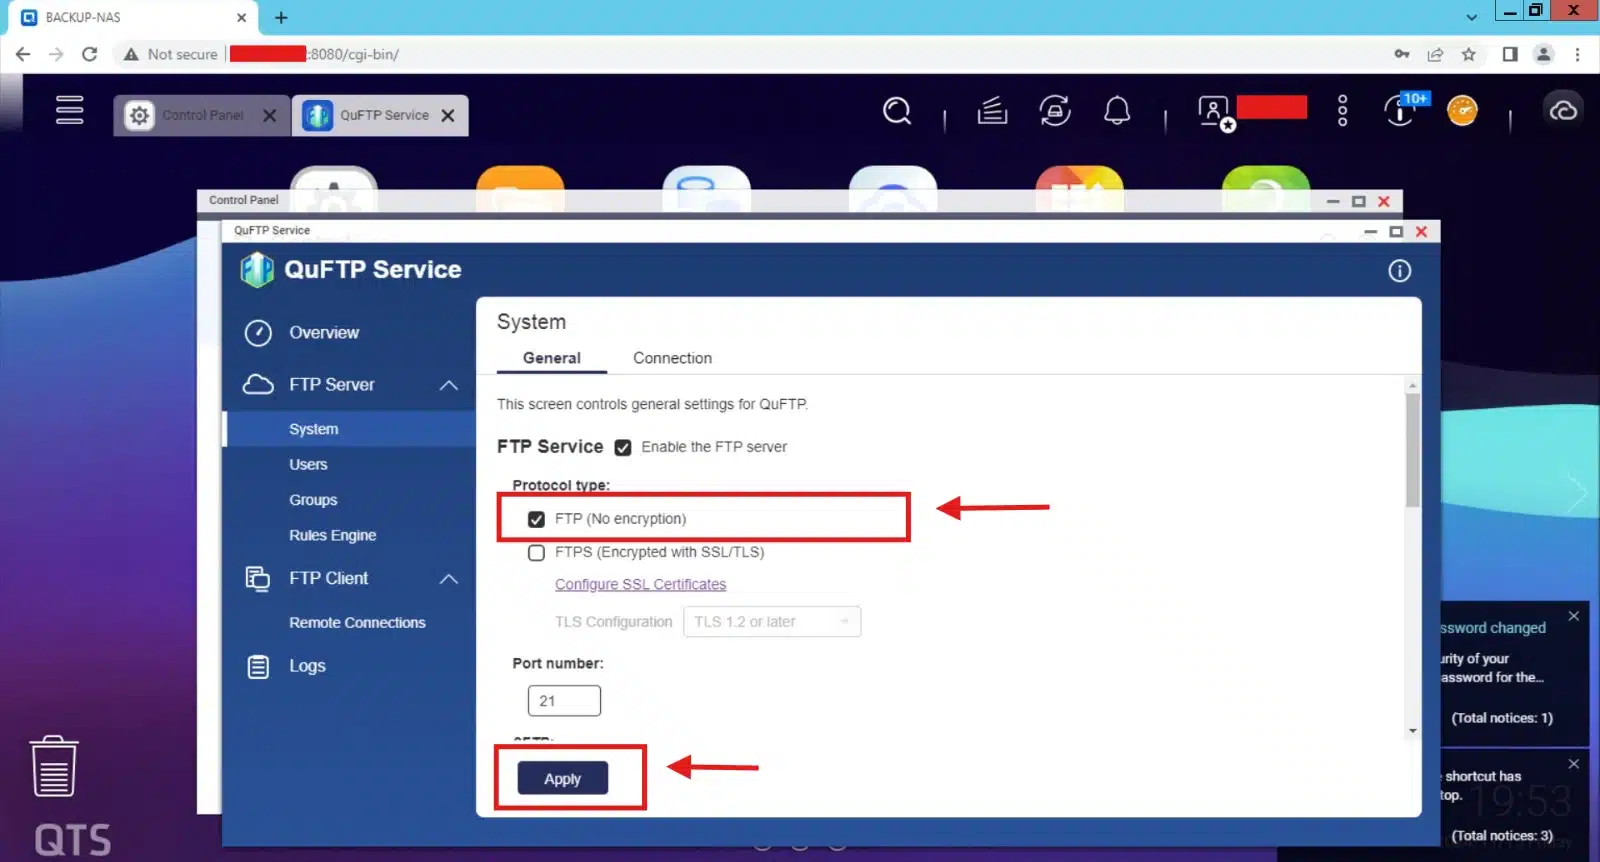
* Again, keep FTP on a trusted LAN or behind a VPN. If the transfer crosses an untrusted network, use SFTP instead.
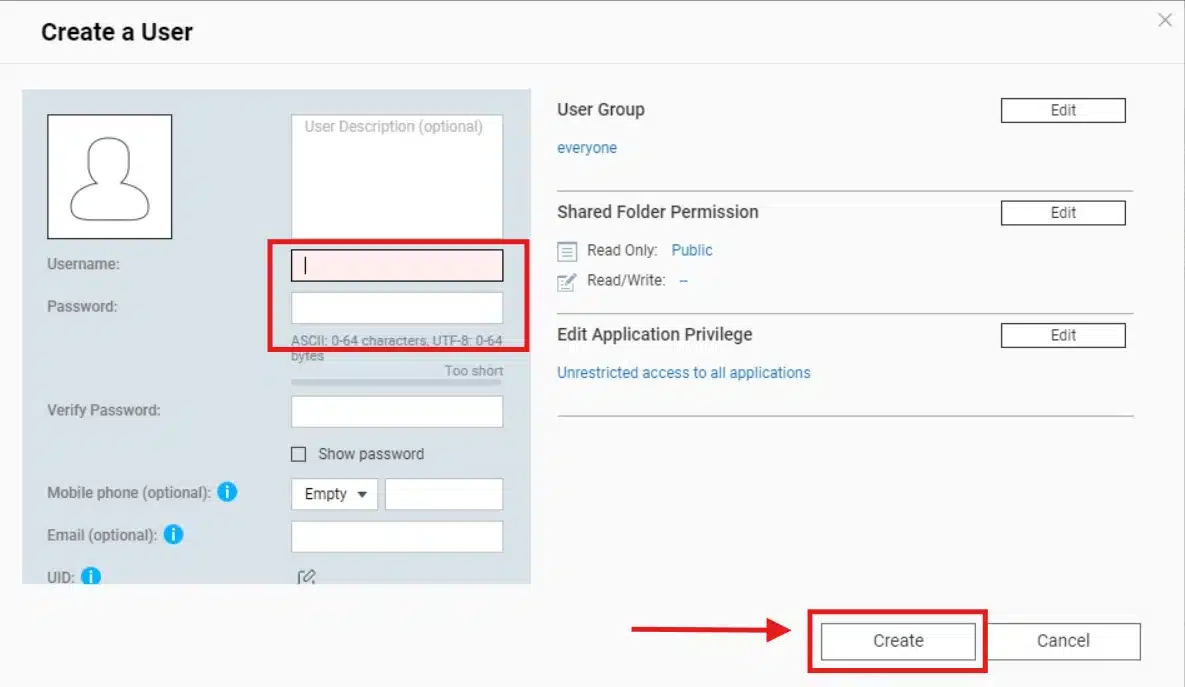
Next, create a dedicated account that FortiGate will use to upload the backup:
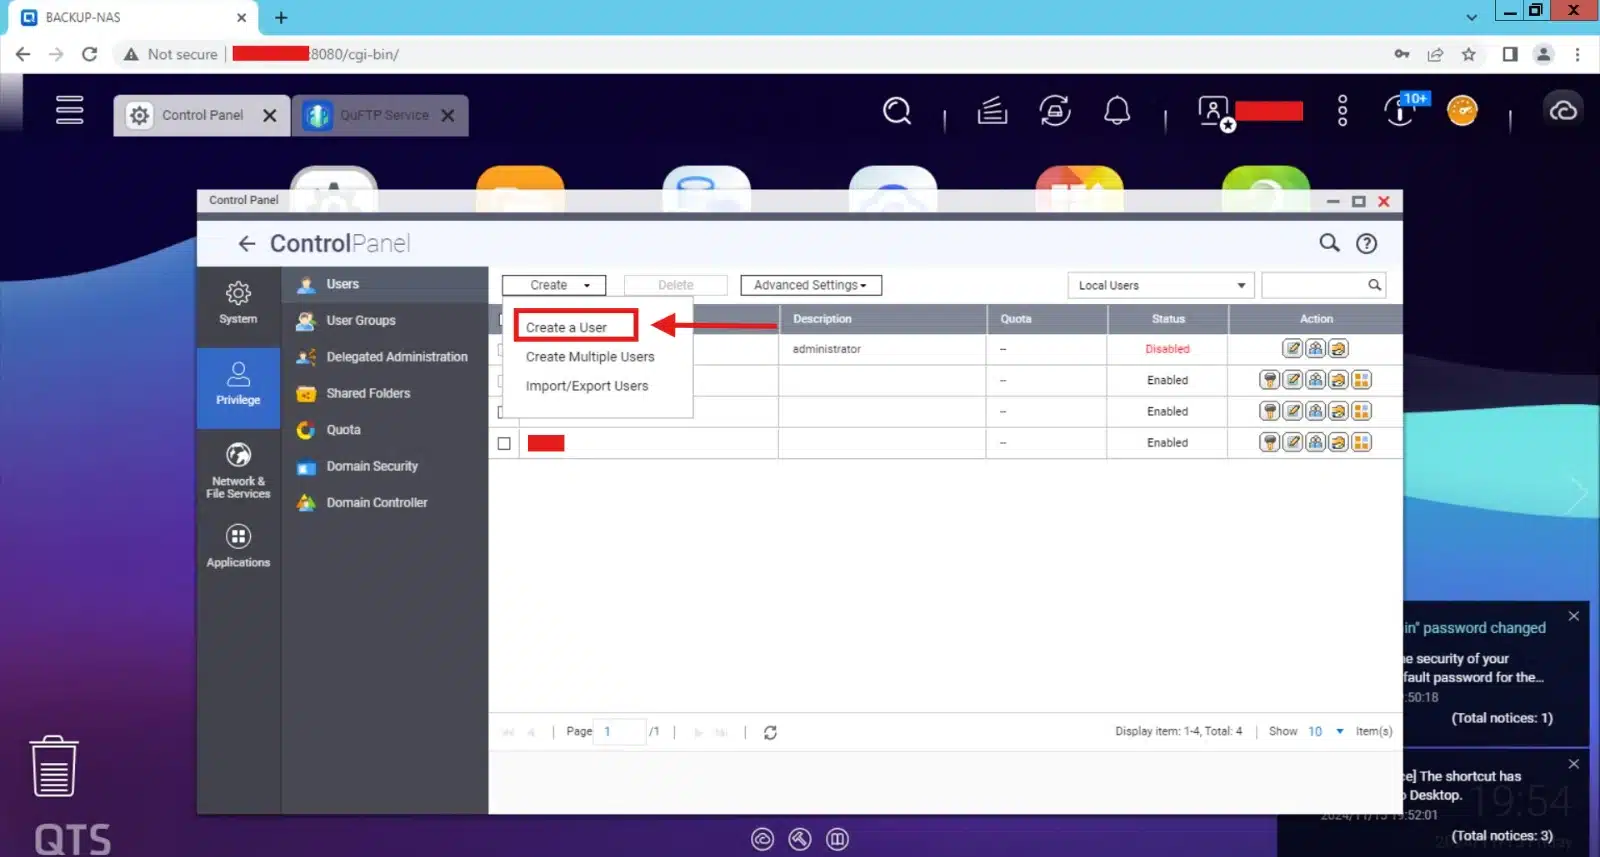
The screenshot uses a simple test account because this was a lab setup. For a real deployment, use a strong unique password and give the account access only to the backup location it needs.
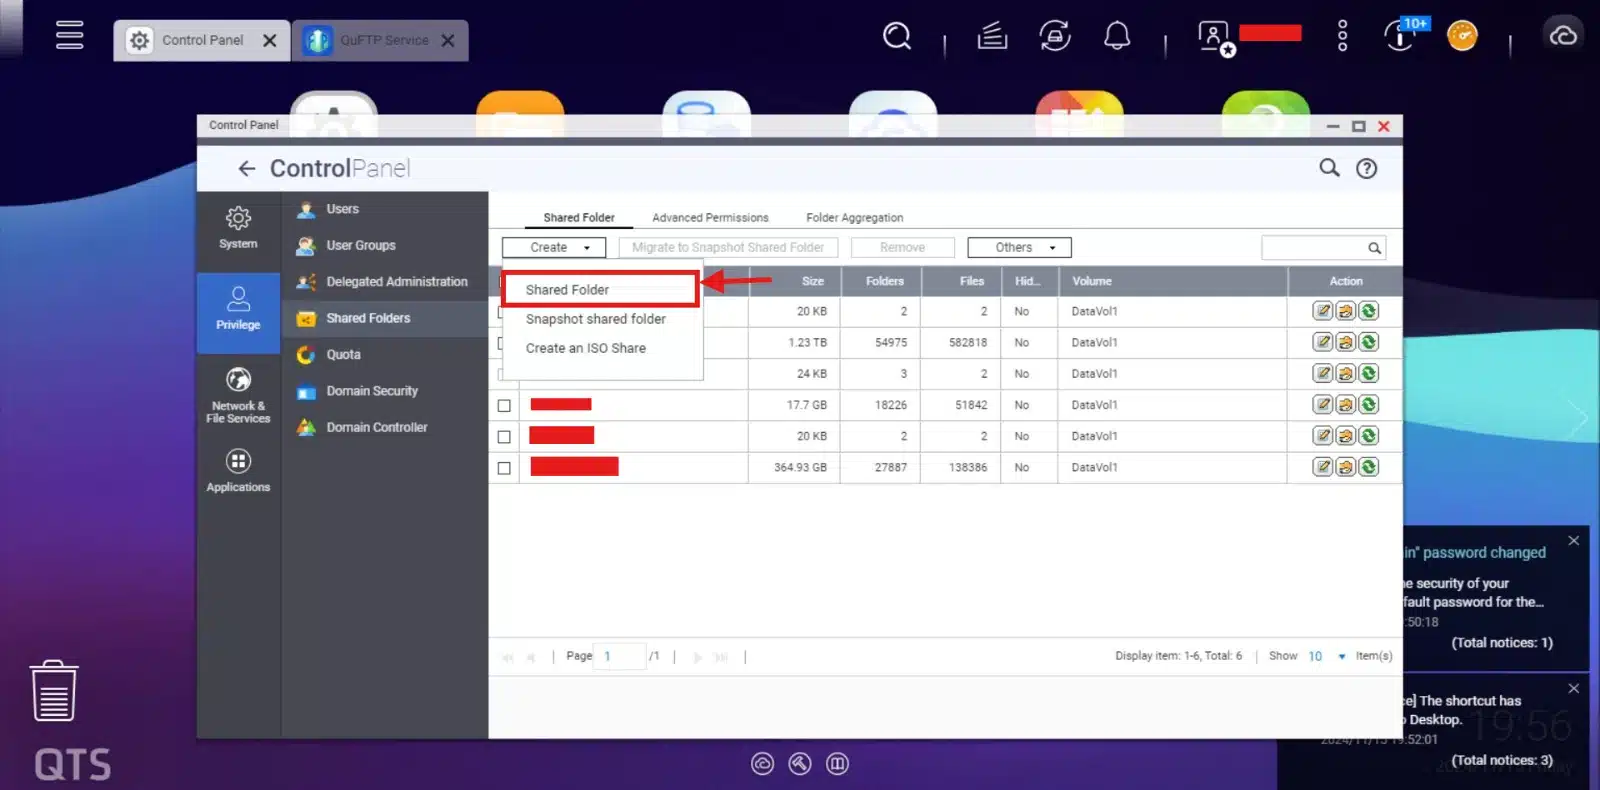
Now create a dedicated folder for the firewall backups if you do not already have one:
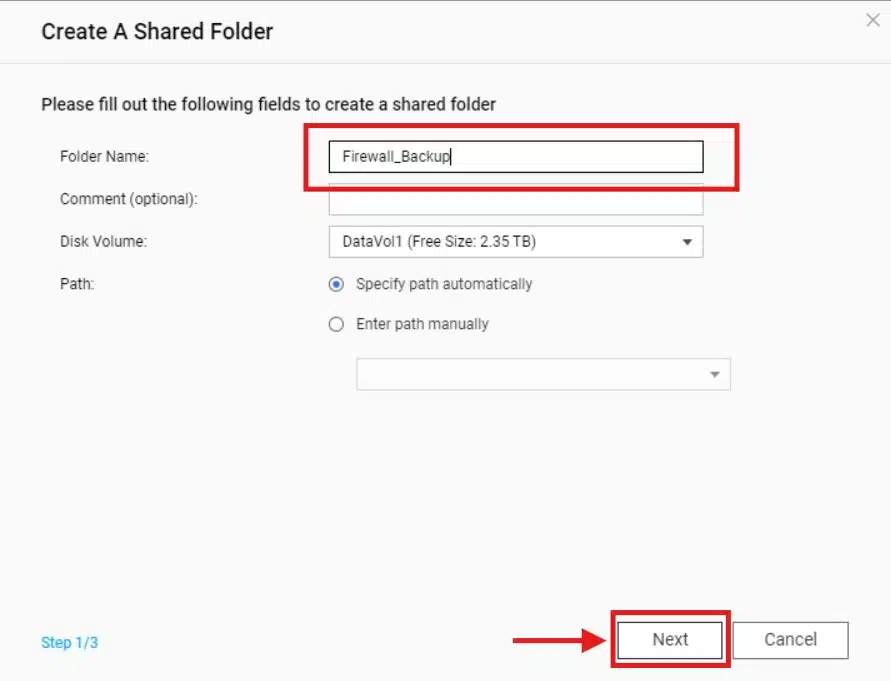
Give it a clear name such as Firewall_Backup:
Give the dedicated backup user read/write permission to this folder:
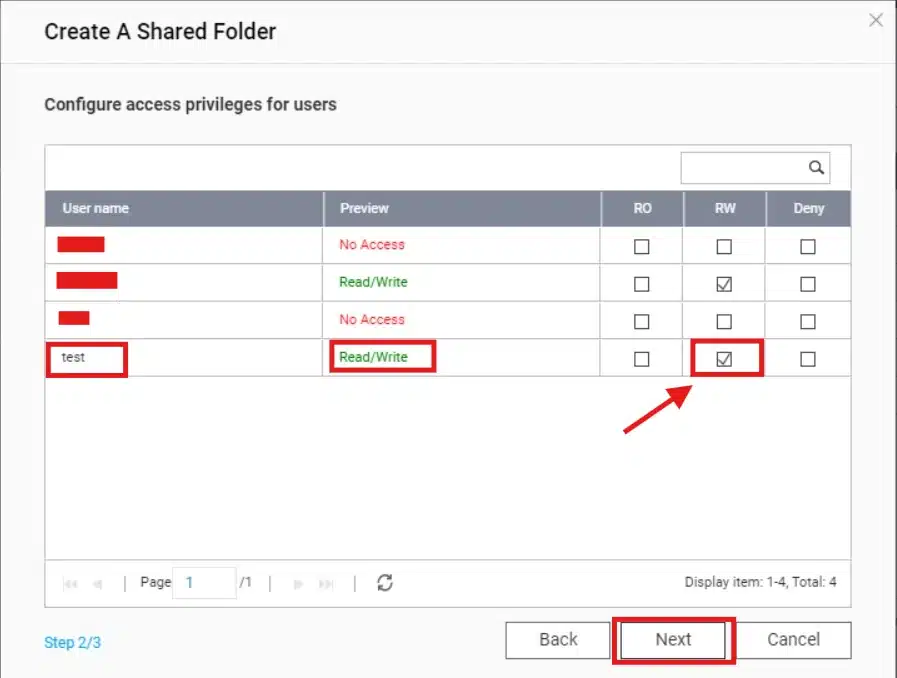
Finish the folder creation and make sure the FortiGate can reach the FTP server IP and port from the network it is using.
Step 2 – Log In to the FortiGate
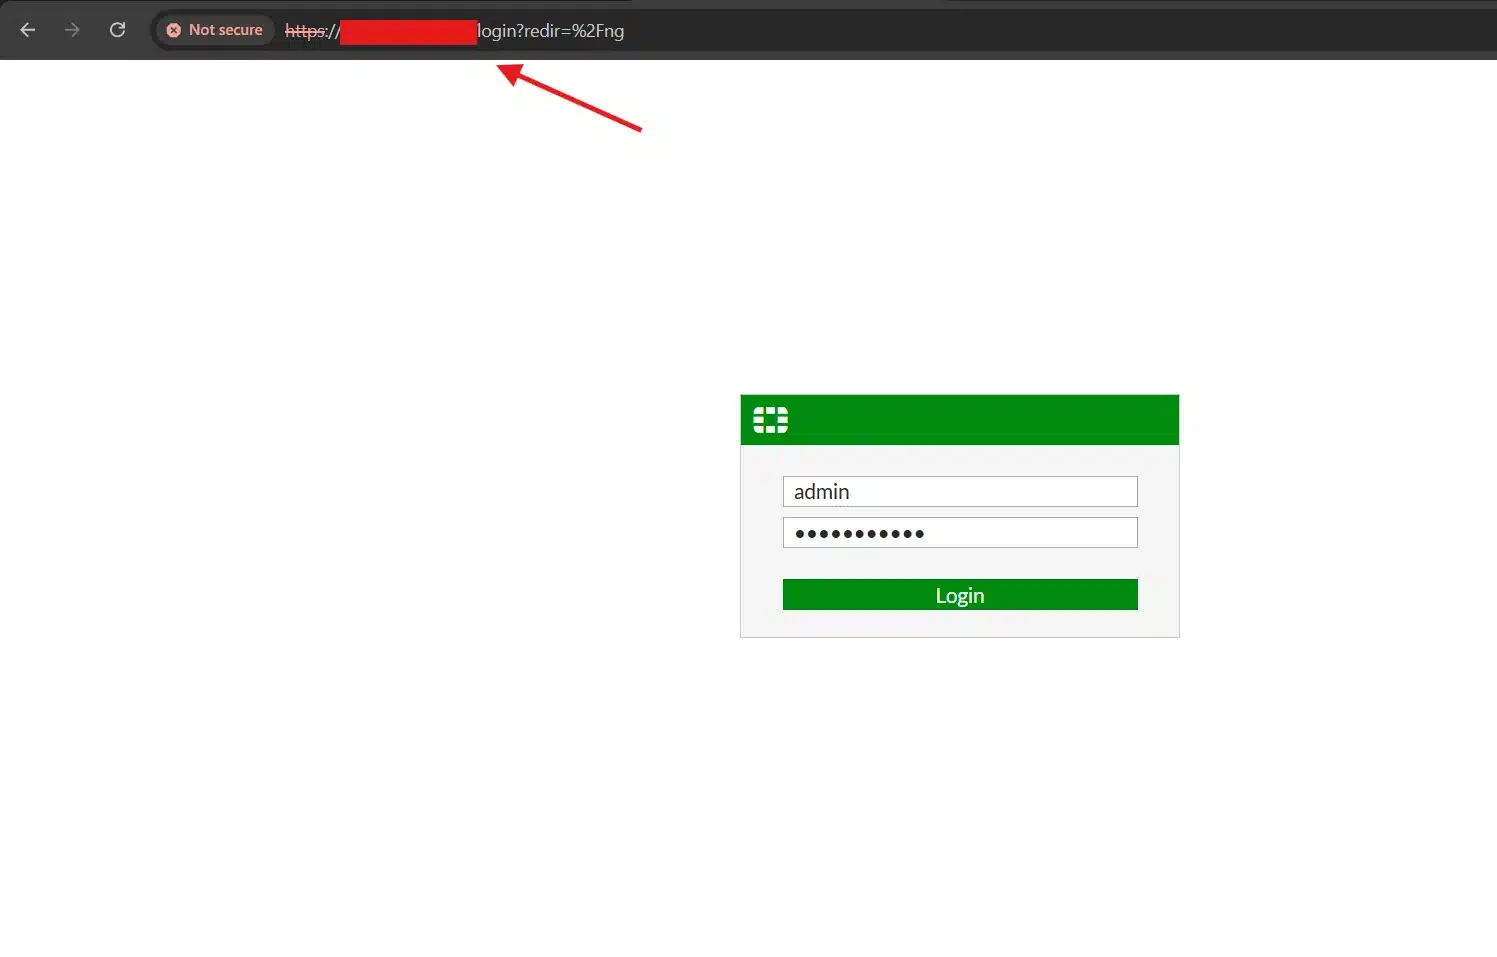
Open the FortiGate management address in your browser and log in with an administrator account. In many small networks the firewall is also the default gateway, but use the actual management IP configured in your environment:
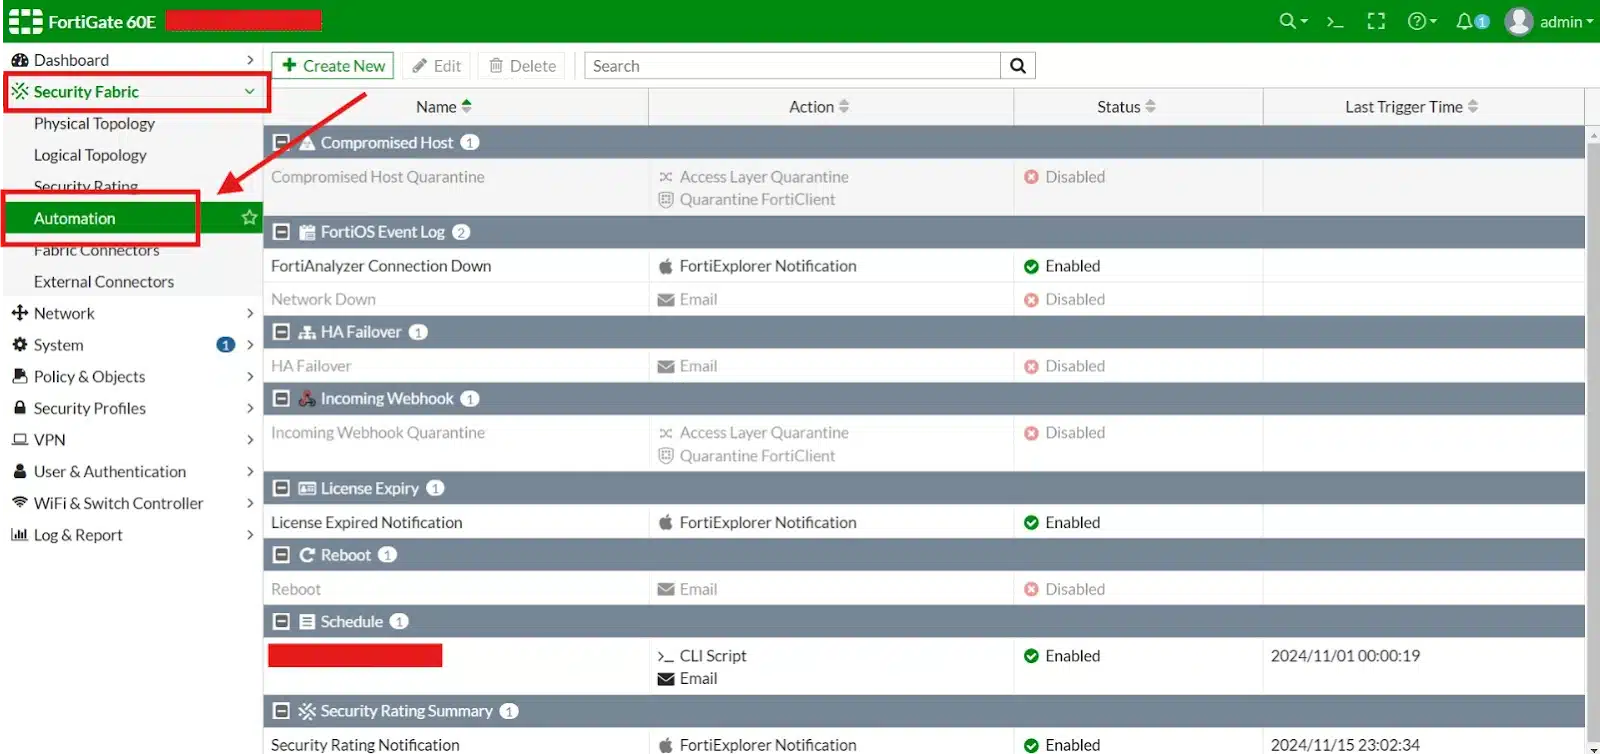
Then go to Security Fabric > Automation:
Step 3 – Create the Scheduled Automation
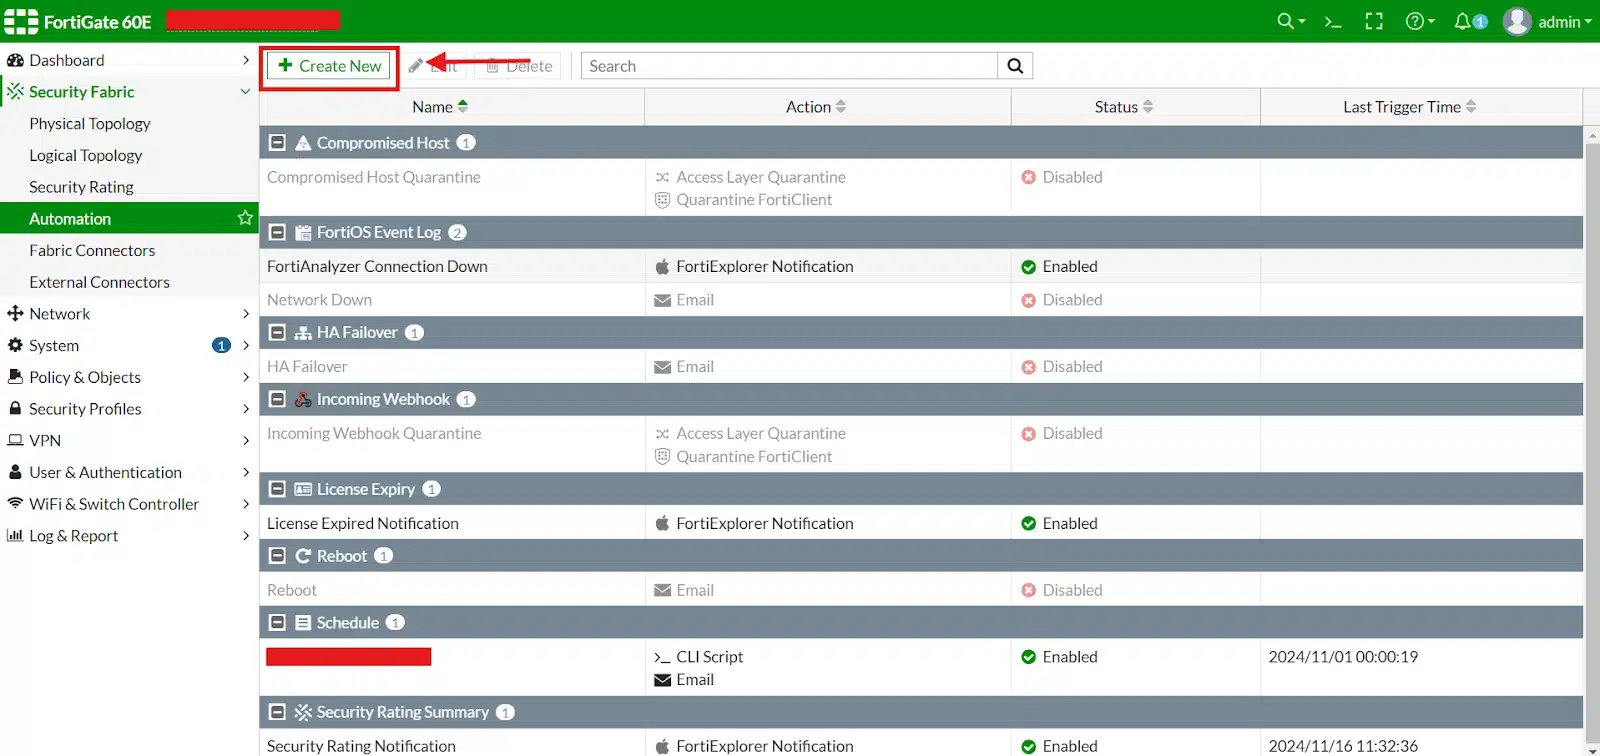
Create a new Automation Stitch:
Give the automation a clear name, for example Backup Job:
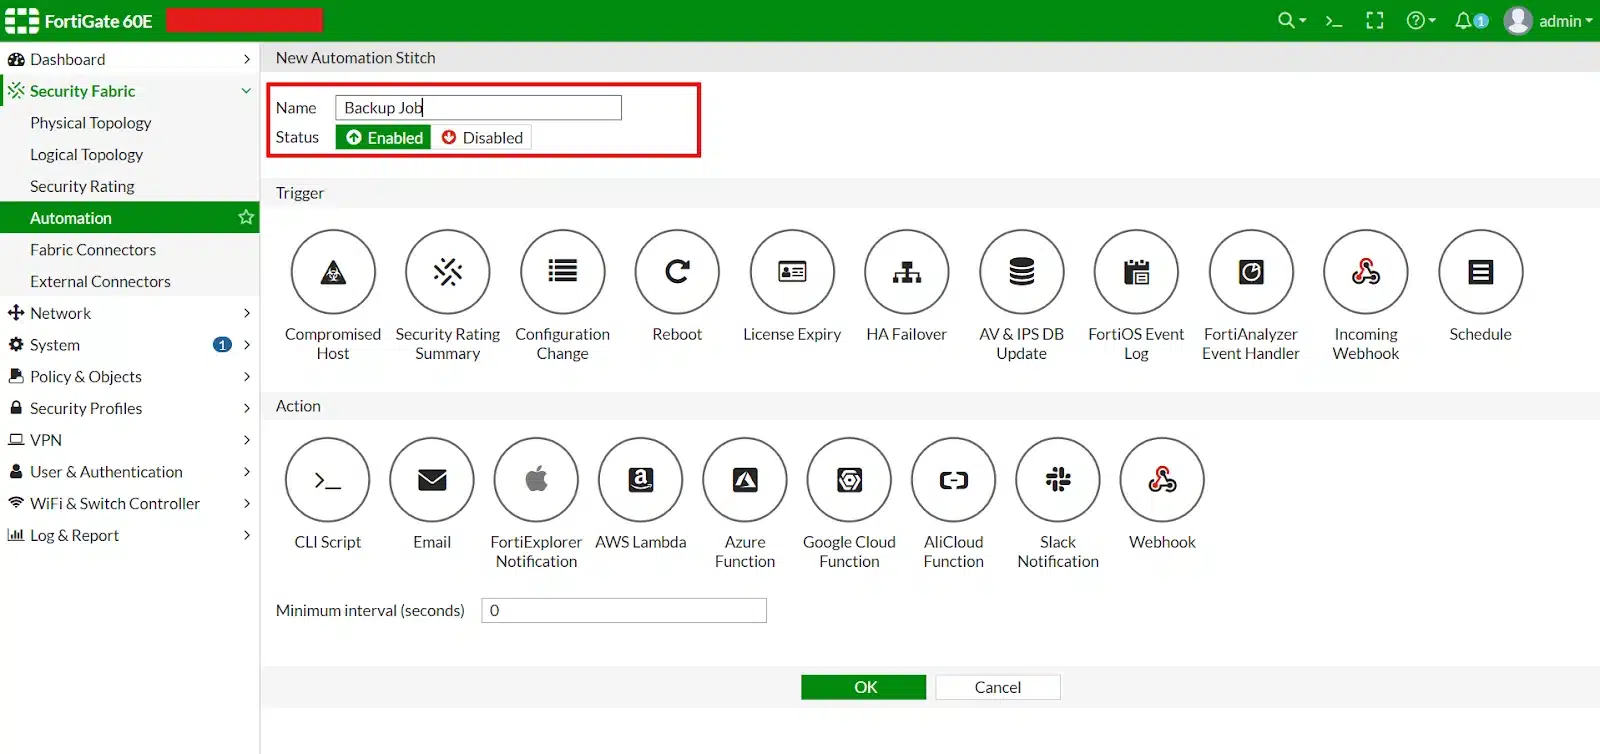
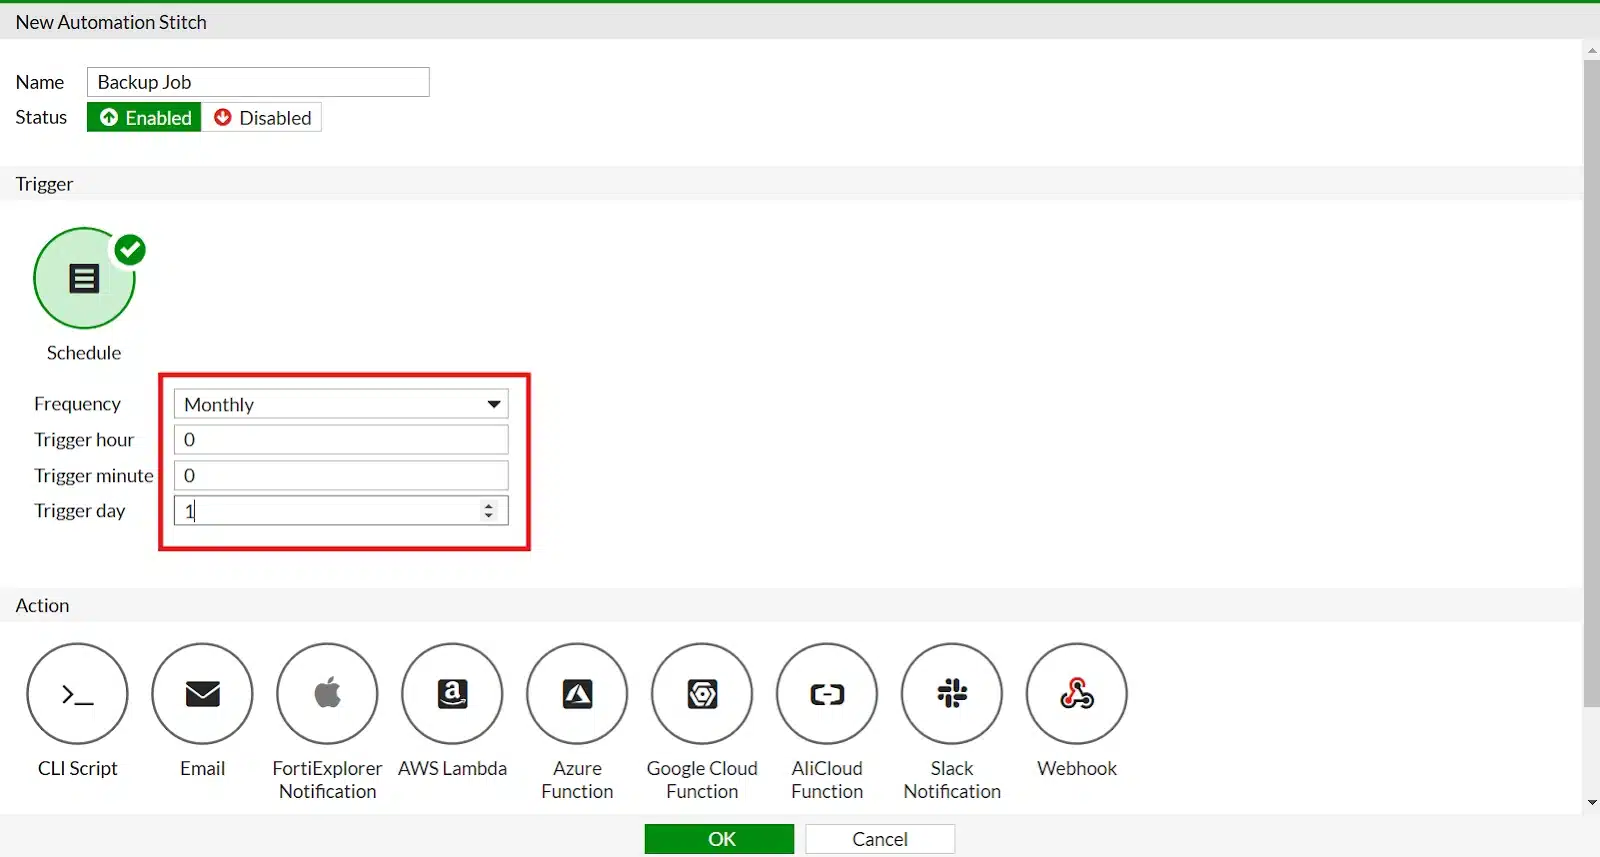
In the Trigger section, choose a scheduled trigger and set the frequency and time you want the backup to run:
For the Action, choose CLI Script:
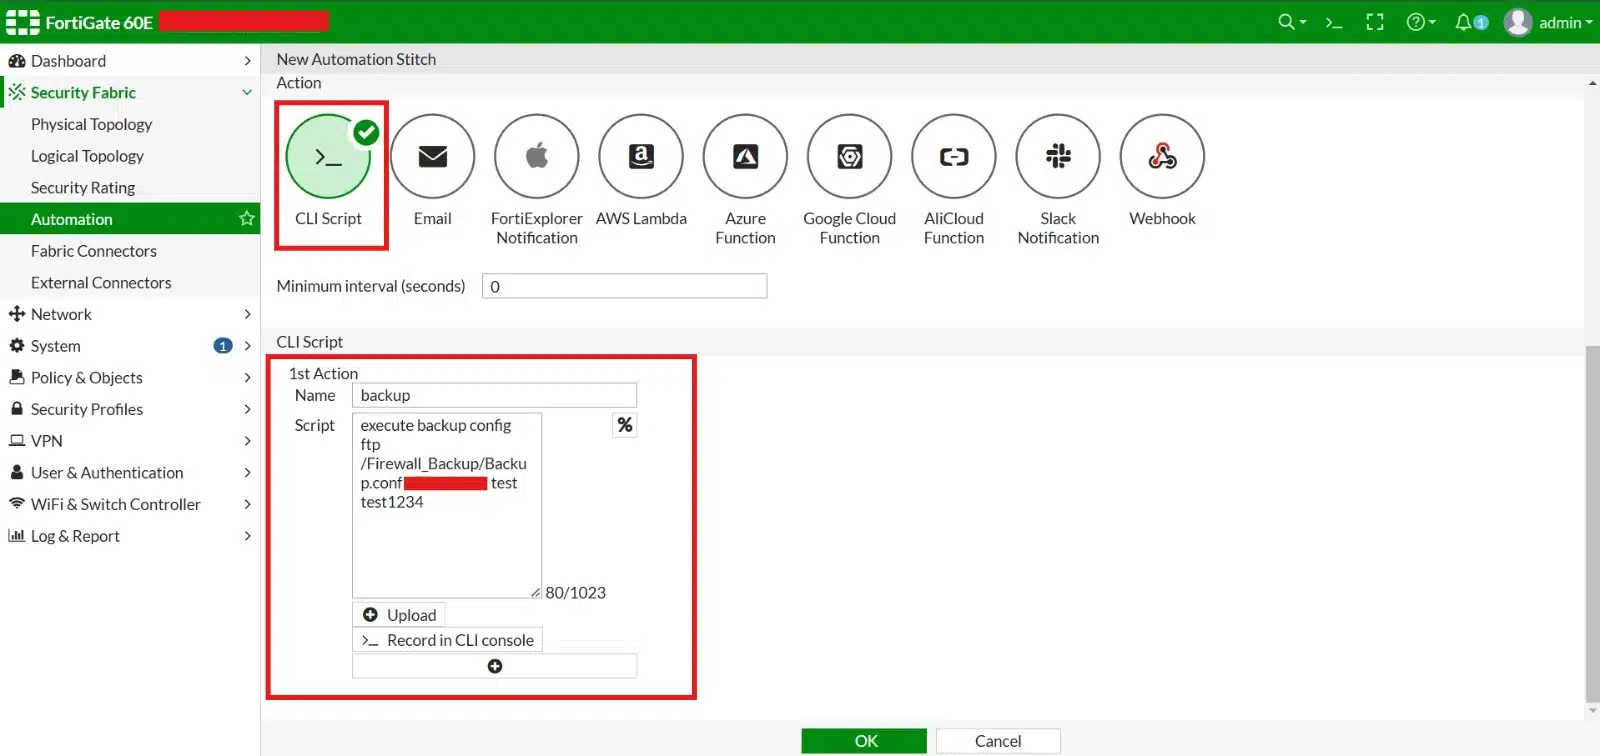
The FortiOS FTP backup syntax is:
execute backup config ftp <filename> <ftp-server>[:port] <username> <password> [<backup-password>]For example:
execute backup config ftp /Firewall_Backup/FGT-%%date%%.conf 192.168.1.50:21 fortigate_backup YOUR_FTP_PASSWORDThe exact remote path depends on the FTP server root and permissions. If your FTP account is already restricted to the backup folder, you may only need a filename instead of the full path.
I prefer using %%date%% in the filename so the scheduled job creates separate backup generations instead of overwriting the same file every day. Fortinet supports this variable inside Automation Stitch actions. It is an automation variable, so do not expect it to expand if you paste the same command manually into the CLI.
FortiOS also allows an optional backup password after the FTP password. This protects the configuration file contents, which is useful because FortiGate configuration backups can contain sensitive information. It does not make FTP itself encrypted; FTP credentials and traffic are still unprotected on the network.
You can verify the current syntax in the Fortinet execute backup CLI reference.
Multi-VDOM note: if VDOMs are enabled and you want the global configuration from an Automation Stitch, Fortinet recommends entering the global context before the backup command. If you intentionally want to back up one VDOM instead, enter that VDOM context before running the command.
Step 4 – Add an Email Notification (Optional)
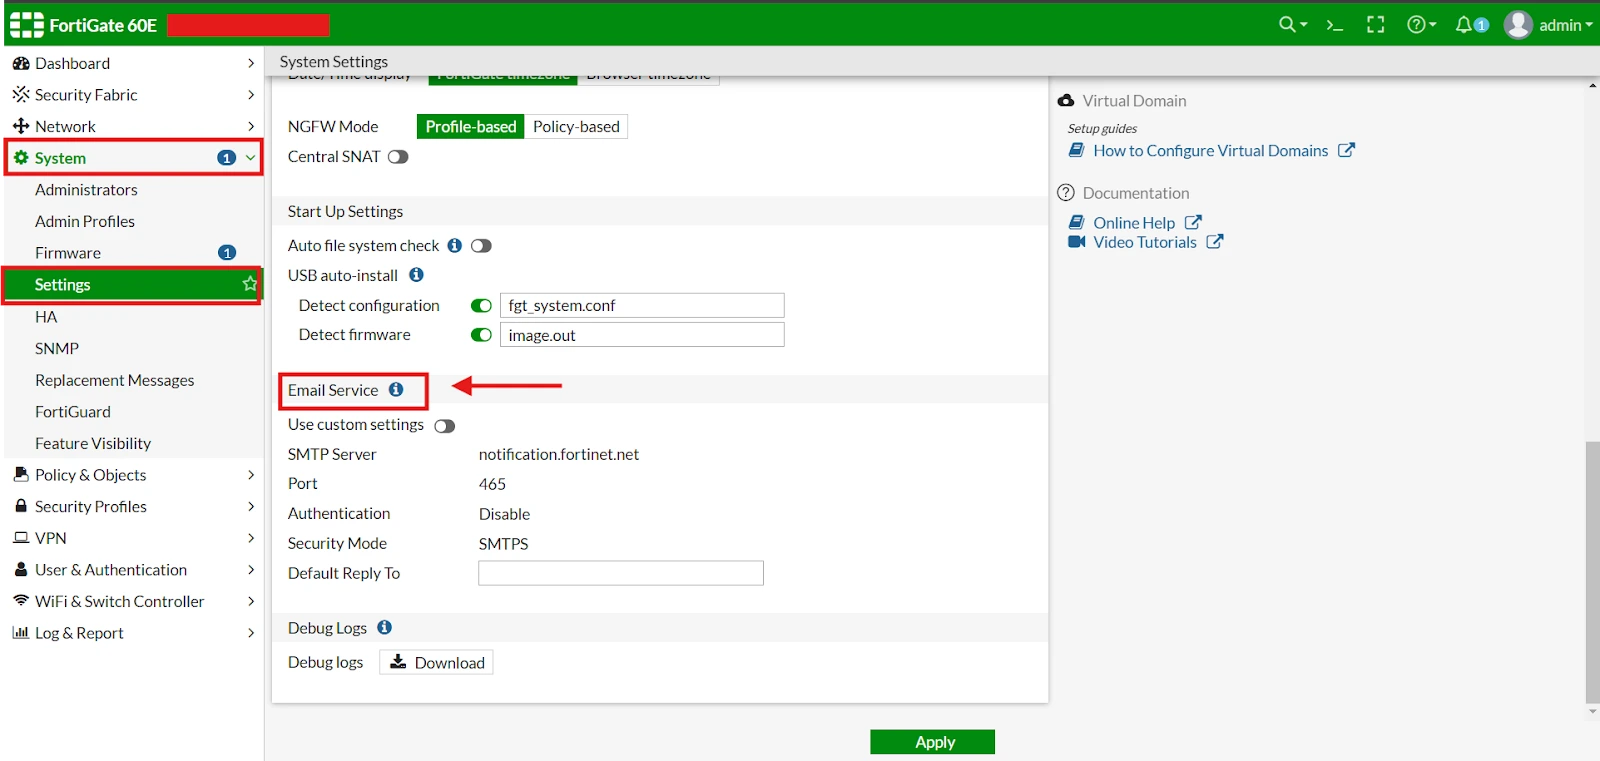
You can also add an email action after the CLI script so you know whether the automation ran. First, make sure the FortiGate email service is configured.
Go to System > Settings and review the Email Service. You can use your own SMTP configuration or the supported Fortinet notification service depending on your FortiOS version. Fortinet has a separate email notification configuration guide.
Then add an Email action to the Automation Stitch:
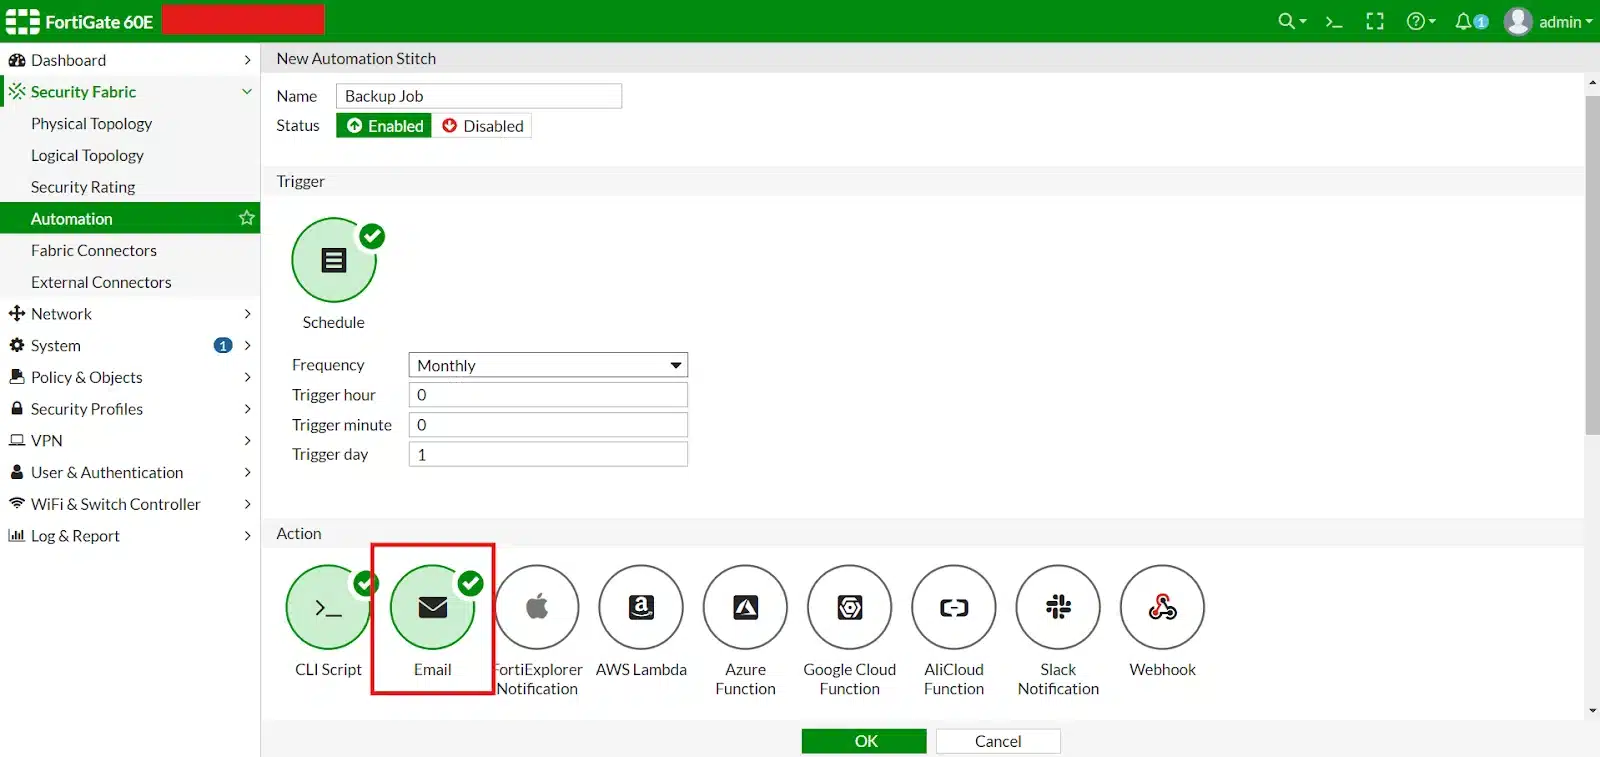
Enter the recipient, subject, and message:
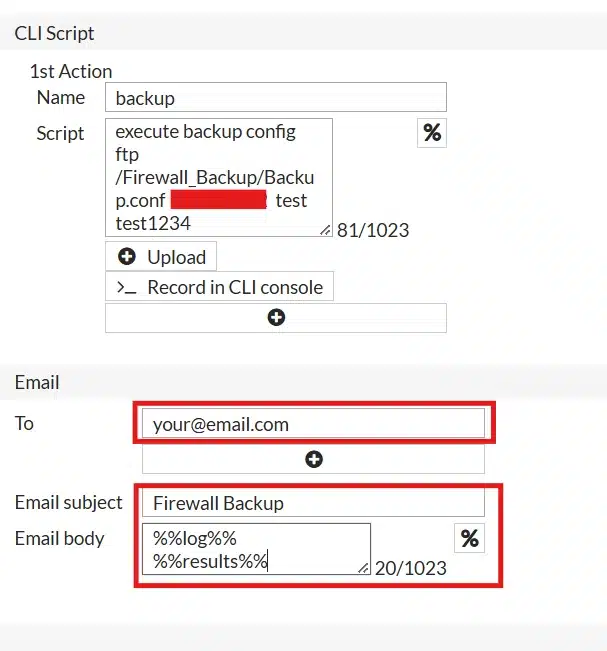
If you want the output of the previous CLI Script action in the email body, use %%results%%. The %%log%% variable is mainly useful when the Automation Stitch was triggered by a log event. For this scheduled backup job, %%results%% is the useful variable to check the CLI action result.
Test the Backup Before You Trust It
After saving the Automation Stitch, test it and confirm that the configuration file actually reaches the FTP server. Check the filename, timestamp, and file size instead of assuming that creating the automation is enough.
Also keep multiple backup generations. A single file that gets overwritten every day is much less useful if you later discover that a bad configuration was introduced several days earlier.
FortiGate supports both execute backup config and execute backup full-config. The normal config backup stores the active configuration without all default values, while full-config also includes default settings. For normal recovery, the regular configuration backup is usually enough; full-config is useful when you specifically want the defaults included too.
Conclusion
Automating FortiGate configuration backups is a simple way to remove one manual task from your maintenance routine. The important parts are keeping the FTP destination reachable, using a dedicated account, creating versioned backup files, and actually testing that the files are being written.
If you are using QNAP as the destination, remember that the NAS itself also needs a backup. My QNAP to Amazon S3 guide is one way to keep another copy outside the NAS.