How to Back Up a Synology NAS to an Rsync Server

What this backup setup does
This guide shows how to back up a Synology NAS to an Ubuntu server over rsync using Hyper Backup. The Synology is the source; the Linux server is the off-device destination.
Rsync transfers only changed data after the first run, making it practical for scheduled network backups. For version history and restoration through Hyper Backup Explorer, choose a multiple-version task rather than a plain single-version copy.
Use a dedicated account and an encrypted connection, then test a restore after the first successful run. If you prefer an off-site cloud destination, compare this setup with Google Drive or Amazon S3.
How to set up a Synology rsync backup
Step – 1 – Setup Rsync Server:
I will be using Ubuntu Linux as the Rsync server.
1) Install Rsync on Ubuntu:
| sudo apt update sudo apt install rsync -y |
2) Make directory to store the backed up files:
| sudo mkdir -p /rsync |
3) Create user for remote rsync:
| sudo adduser rsync |
4) Set the Directory permissions:
| sudo chown rsync:rsync /rsync sudo chmod 700 /rsync |
Step – 2 – Configure Hyper Backup on Synology NAS:
1) Install Hyper Backup Application if not installed:
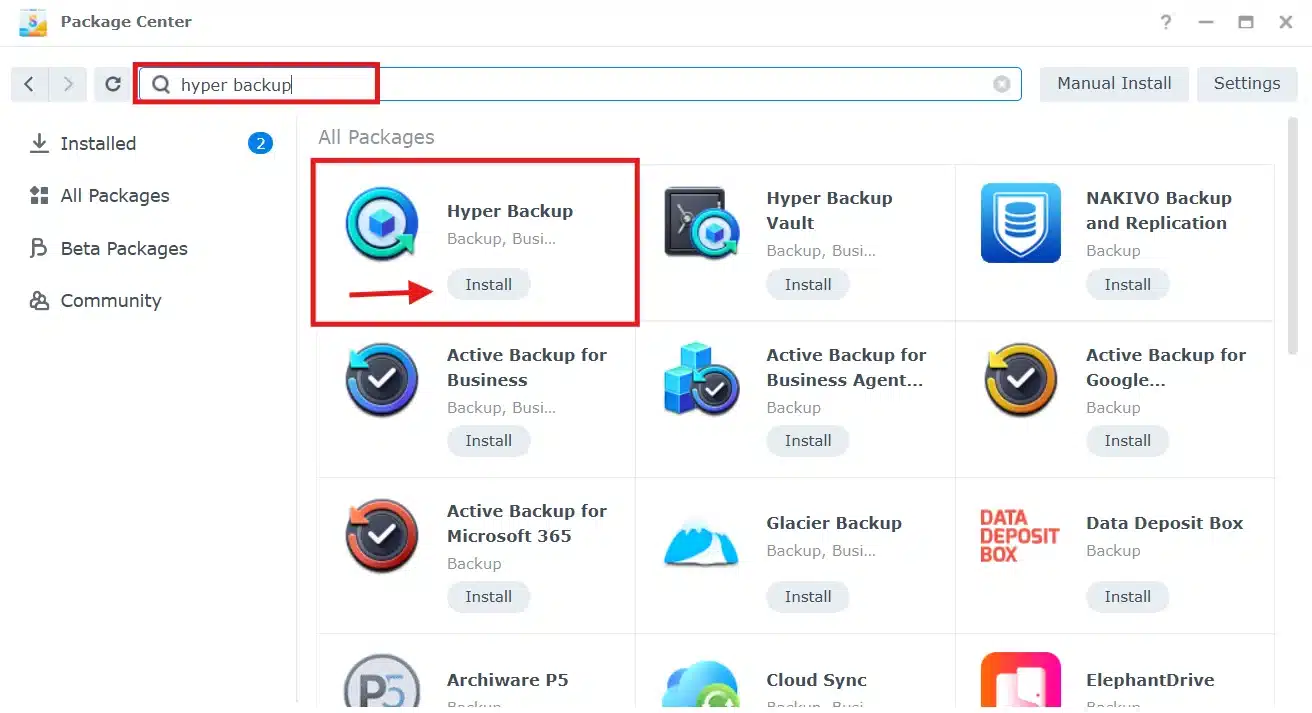
Open Package Center on synology and Search for hyper backup, then click “install”:
Keep the default setting then click “done”, then wait until it finishes downloading and installing.
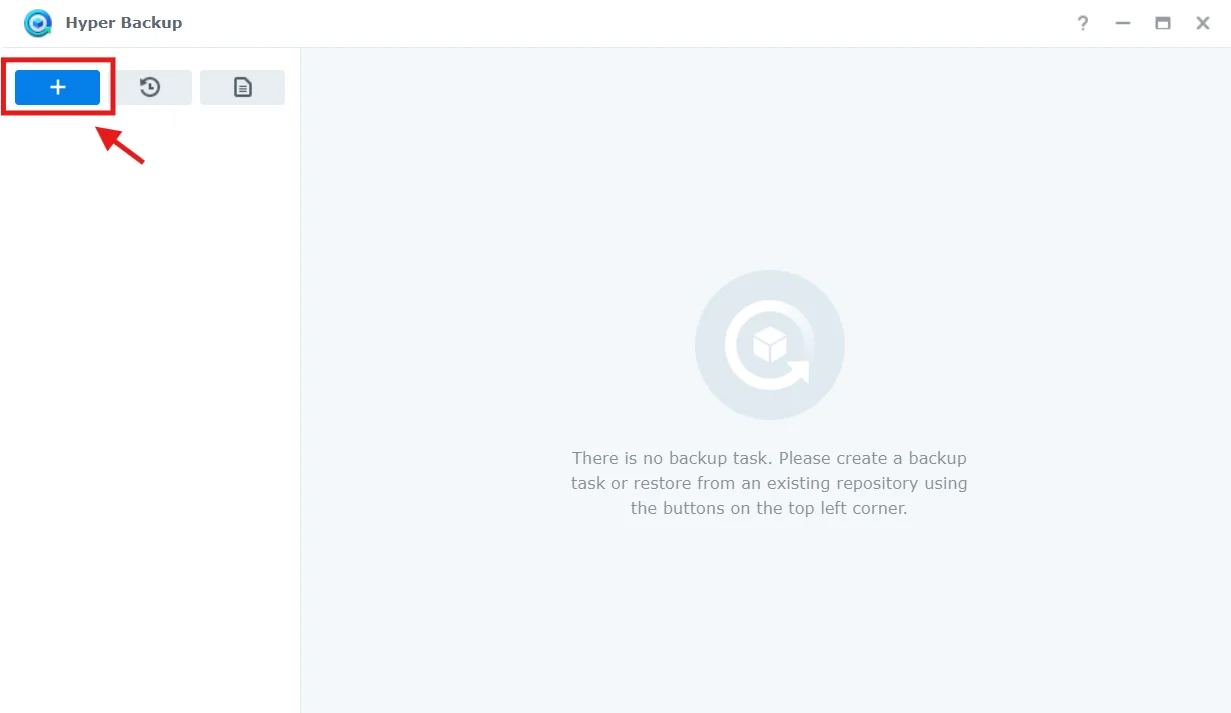
2) Create Hyper Backup Job:
Open Hyper Backup Application, then click on the plus sign to add a new Job:
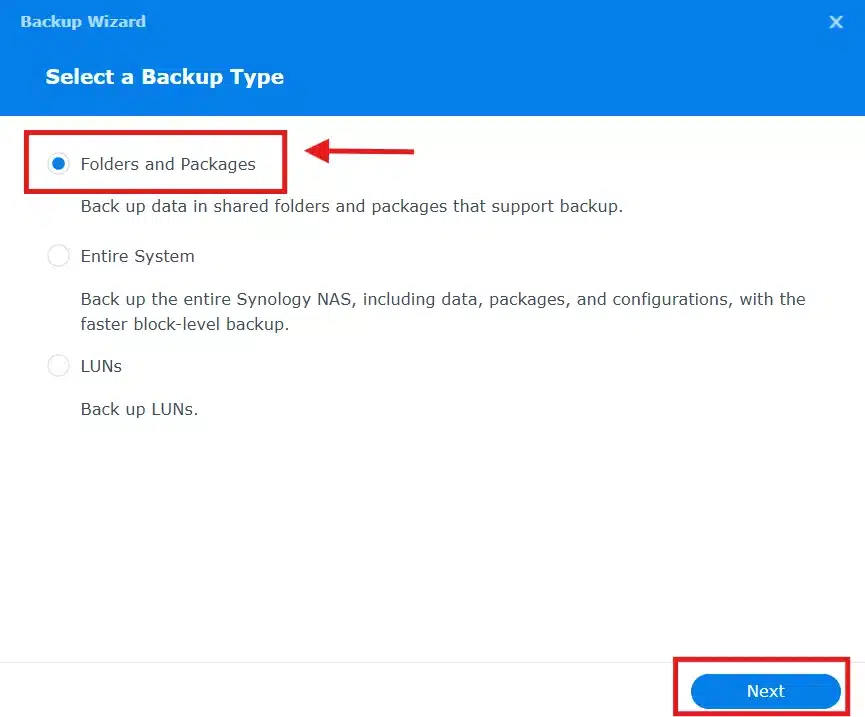
Select the Backup Job as “Folder and Packages”:
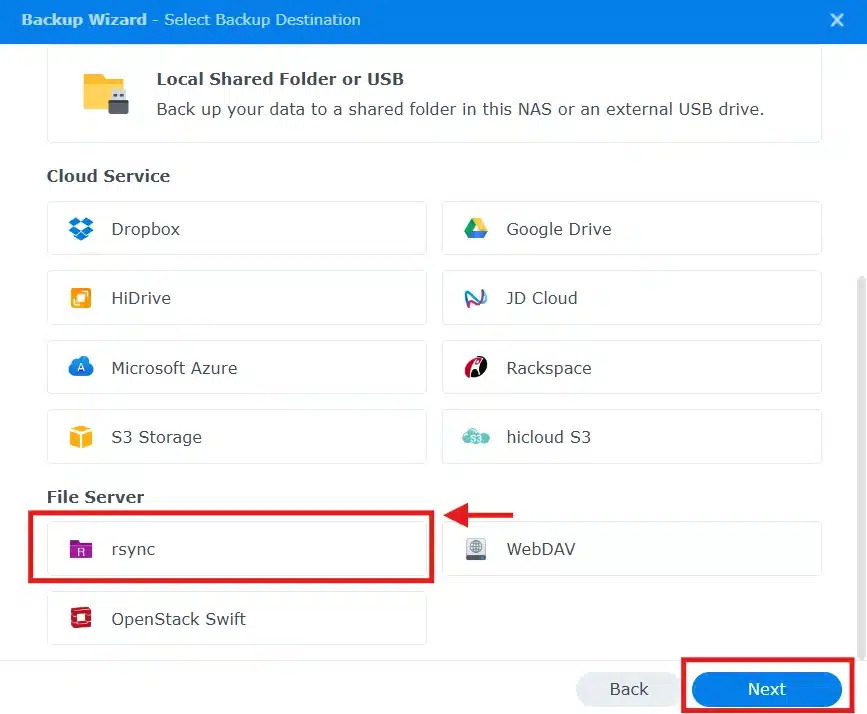
For the backup Destination, scroll down and choose “rsync”:
Here you can choose “Multiple versions” or “Single Version”, choose according to your needs:
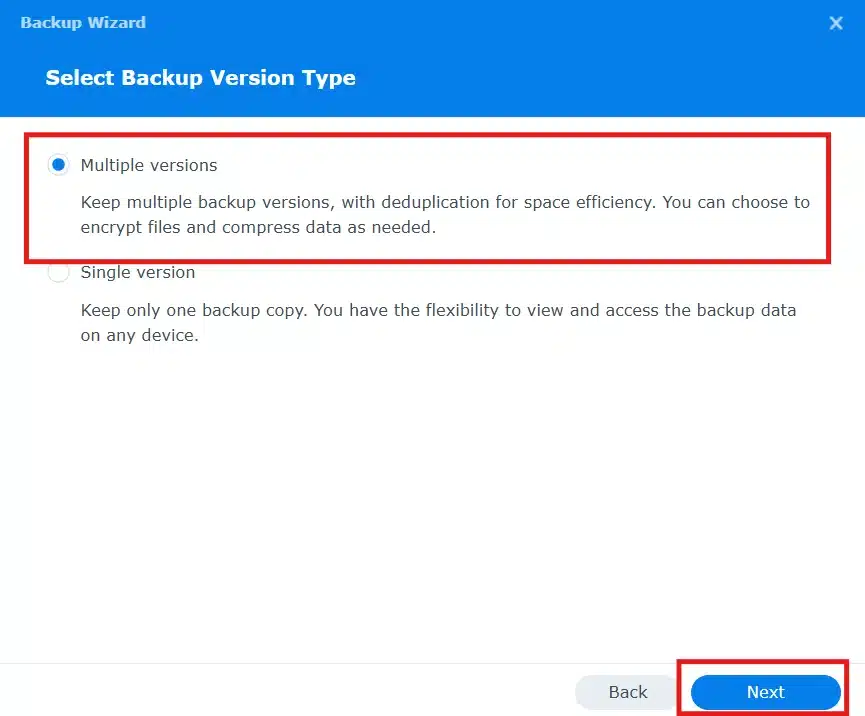
I will choose “Multiple Versions”.
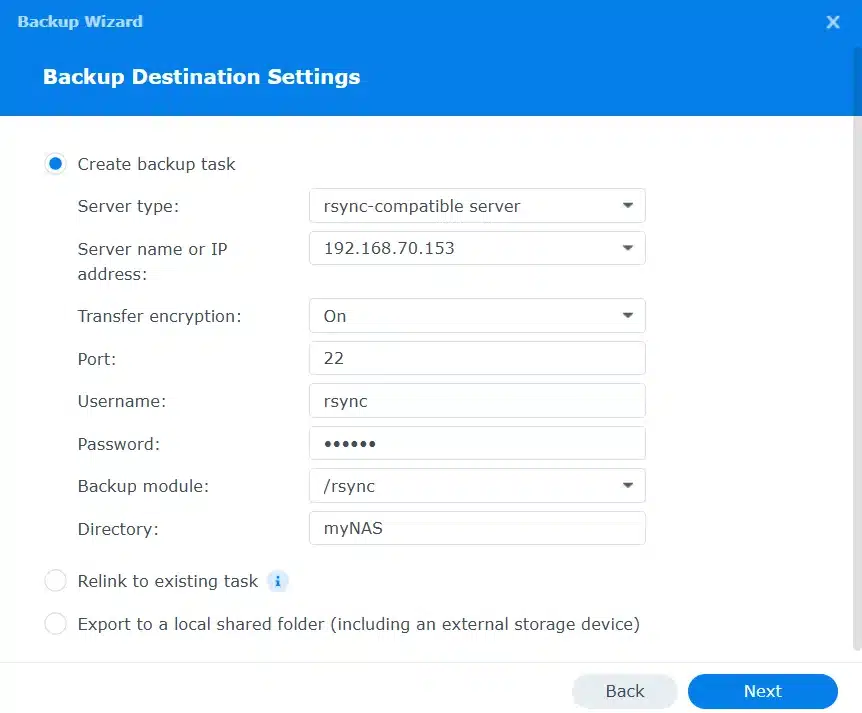
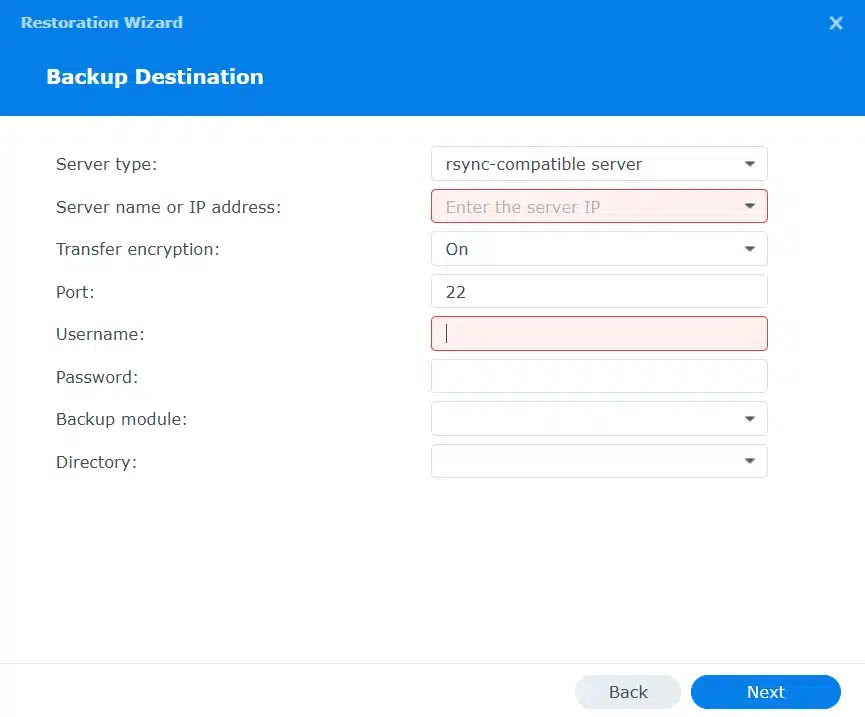
For the backup destination, enter the following settings:
Server type: rsync-compatible server
Server name or IP address: [your Ubuntu IP Address]
Transfer encryption: On
Port: 22
Username: [your rsync username created earlier]
Password: [rsync user password]
Backup module: [rsync directory created earlier]
Directory: [choose a name for the directory inside the rsync directory]
Next, choose which shared folder on your NAS you want to backup:

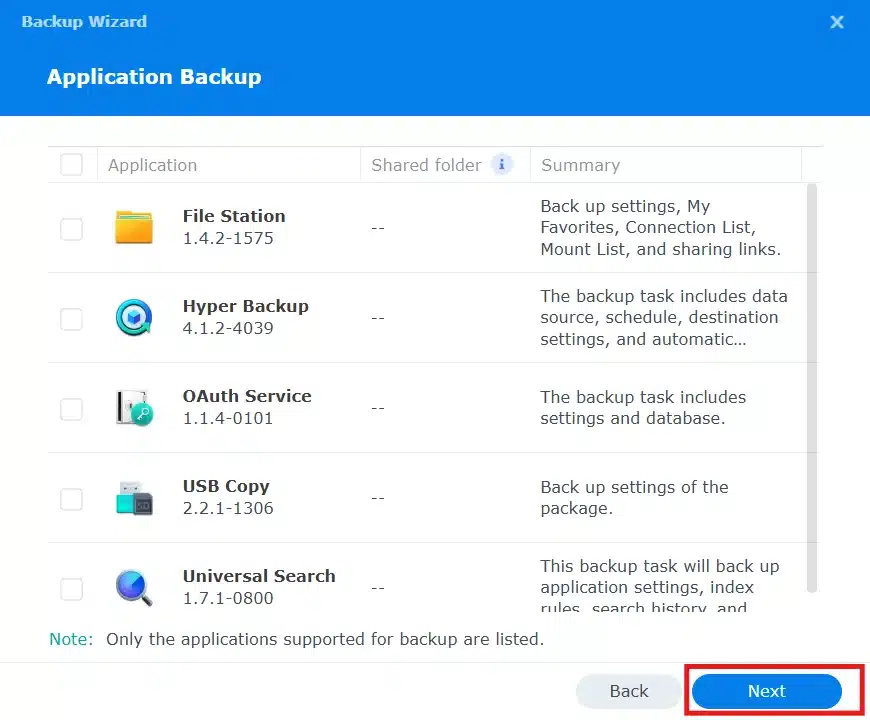
Next, if you want to backup any application, you can choose here:
For the backup settings, you can configure your Backup Job as desired:
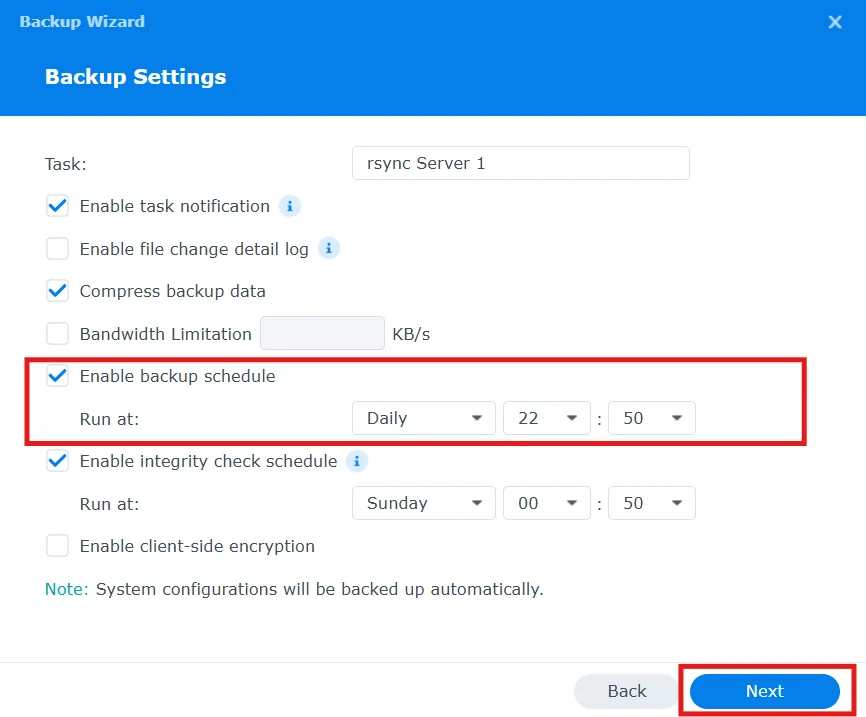
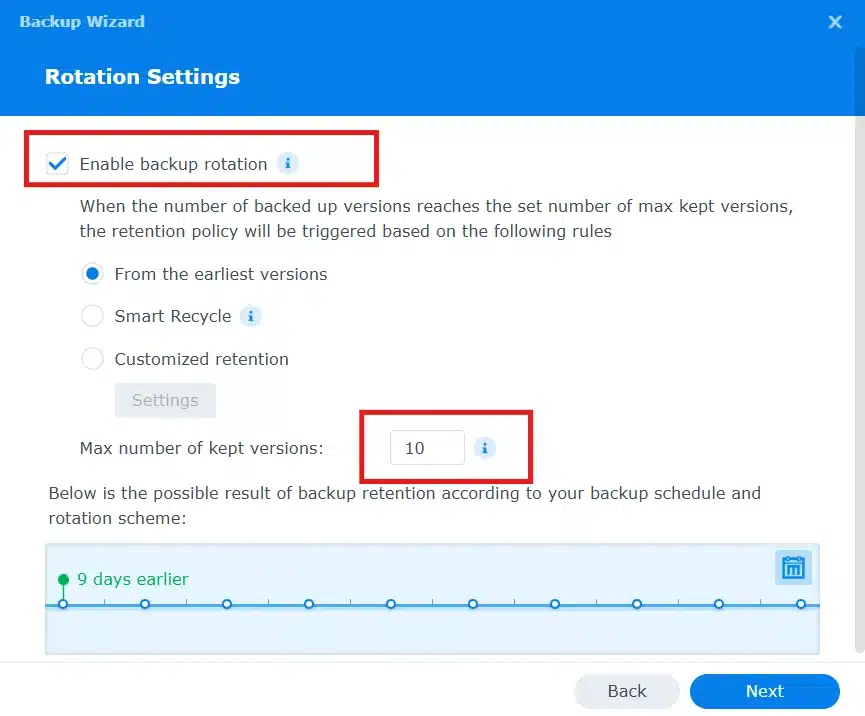
Here you can choose to enable the Backup Rotation, and choose how many versions of the backup you would like to keep:
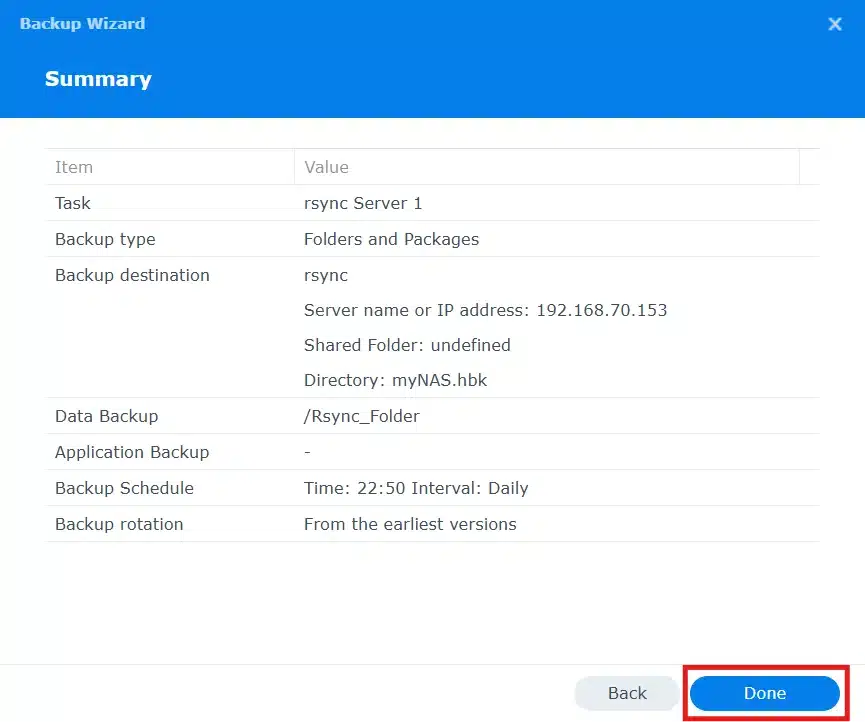
Review your settings and click “done”:
You can choose to “Backup Now”, once you finish creating the Job.
Step – 3 – Review and check the backup:
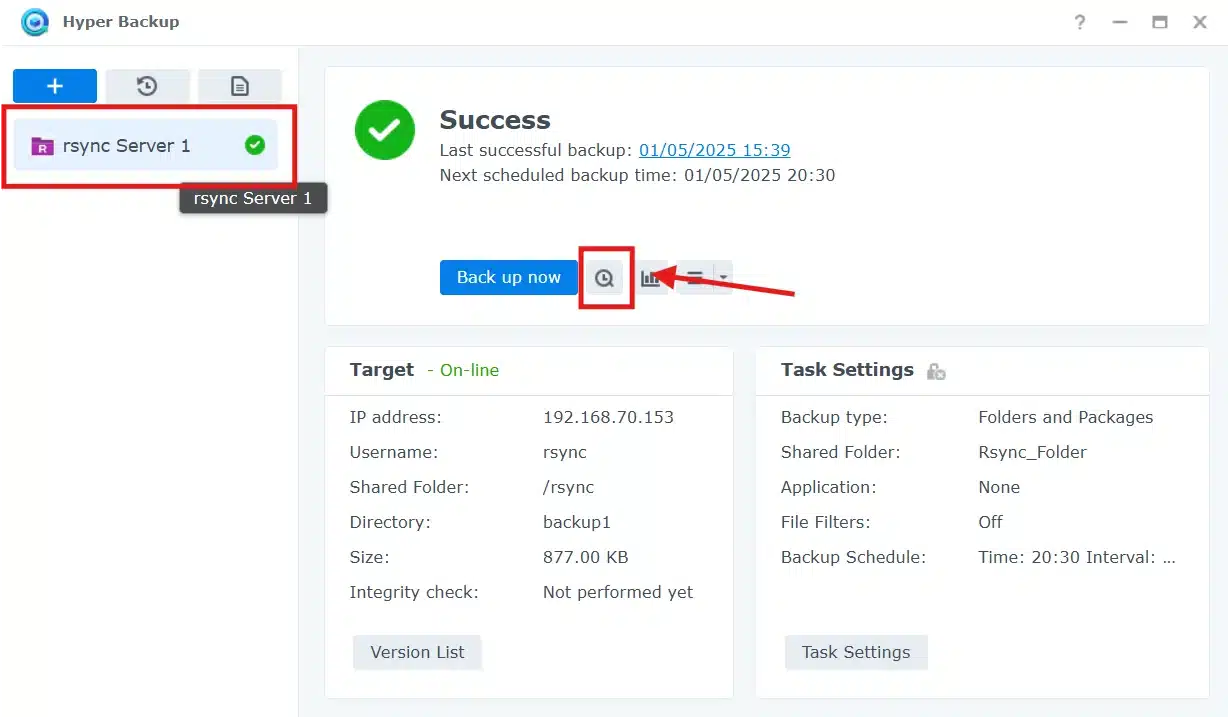
On Hyper Backup Application, select the Backup Job and click on “Backup Explorer” Icon:
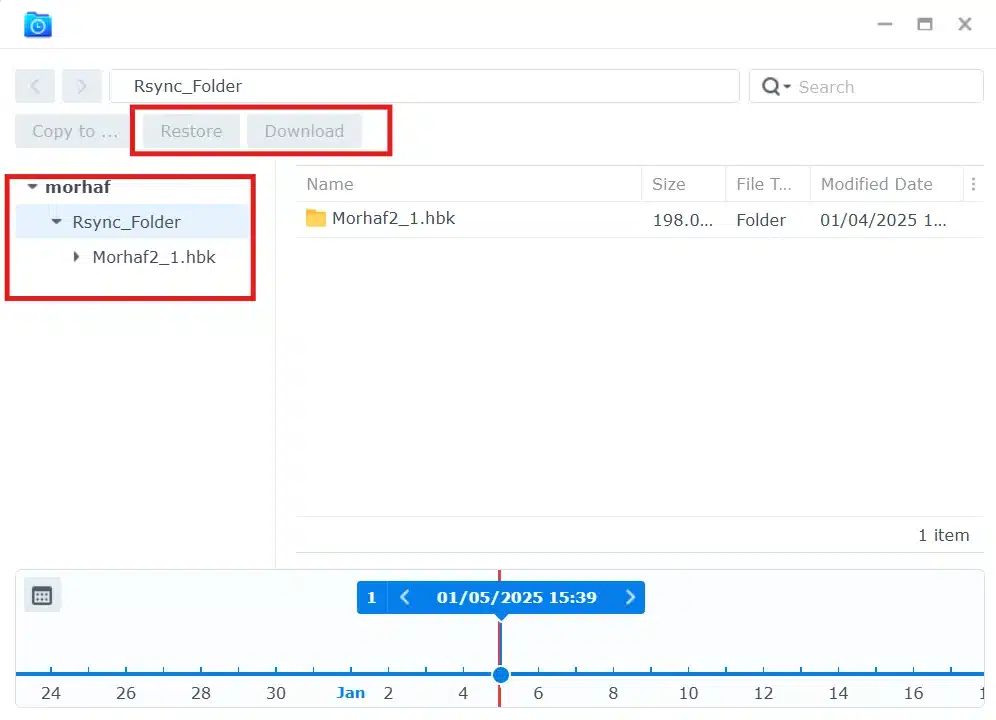
Here you can explore the backup files and folder, and select any file to restore it or download it:
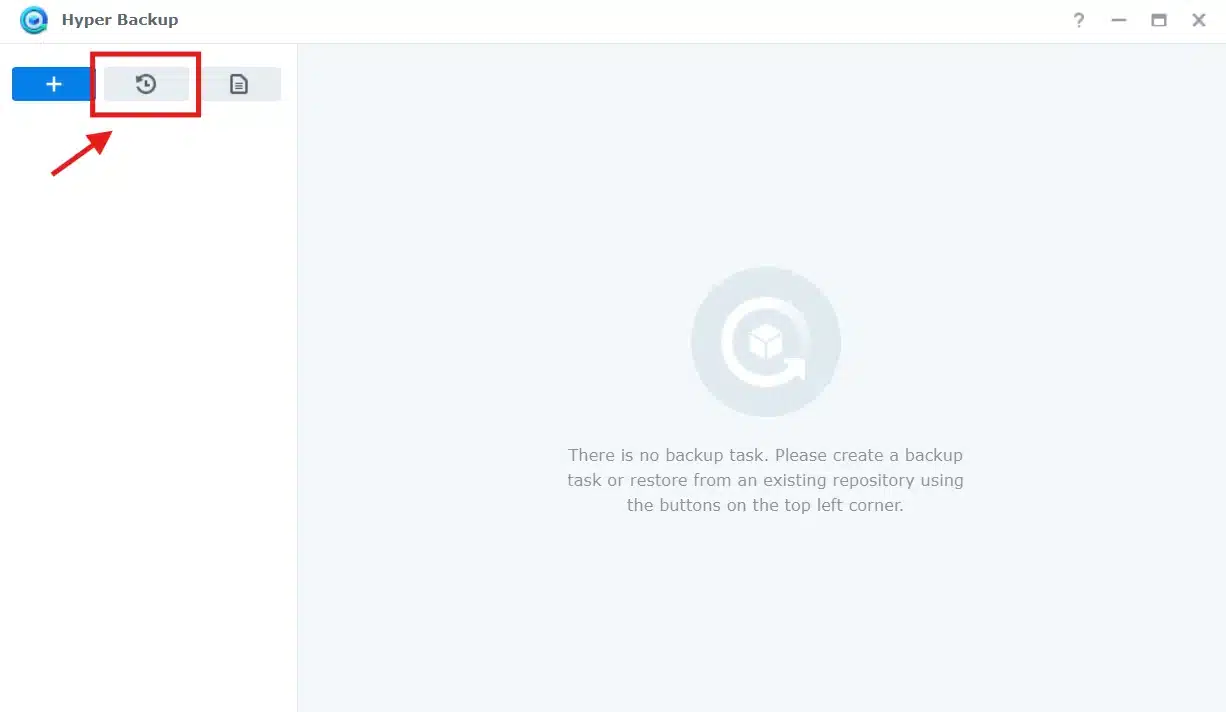
Step – 4 – Restore the backup to a new NAS
If you have a backup job already on an Rsync server, and you want to restore it to a new Synology NAS, or if you reset your NAS and want to restore files from the server, you can do that with Hyper Backup.
Open the Hyper Backup application on the new NAS, and click on restore Icon:
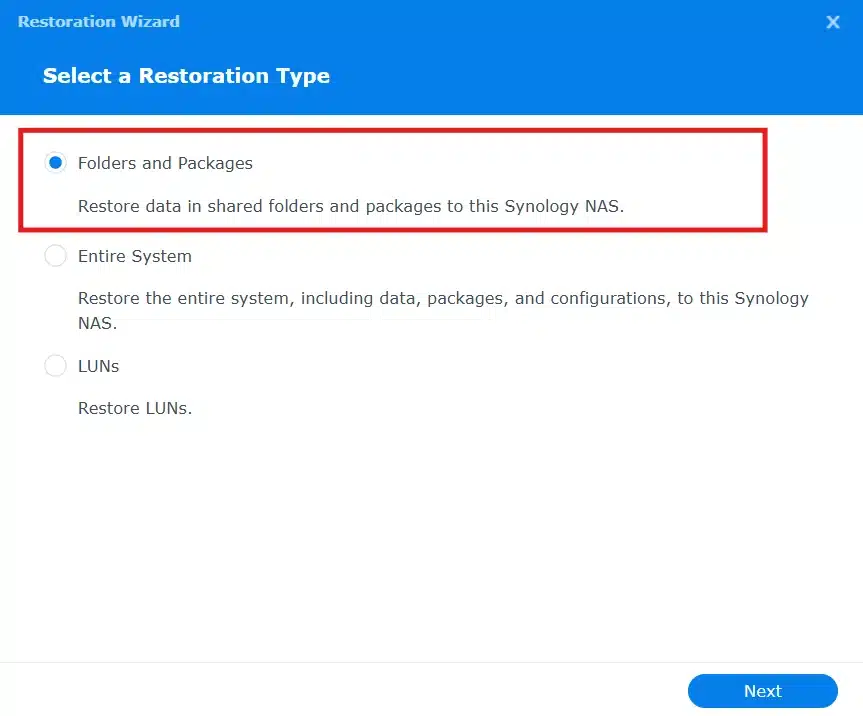
Choose the restoration type:
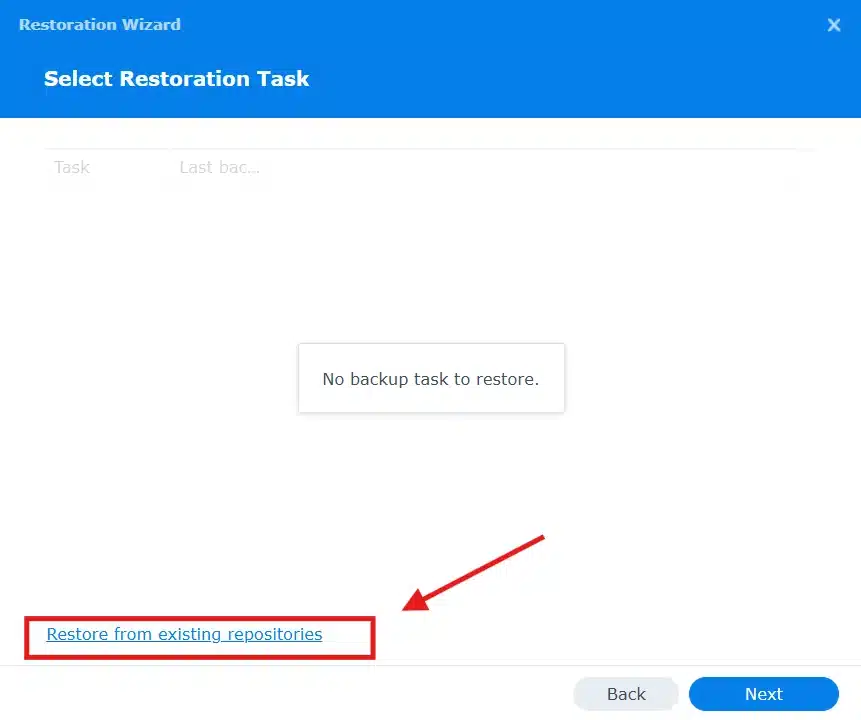
Choose the option as below:
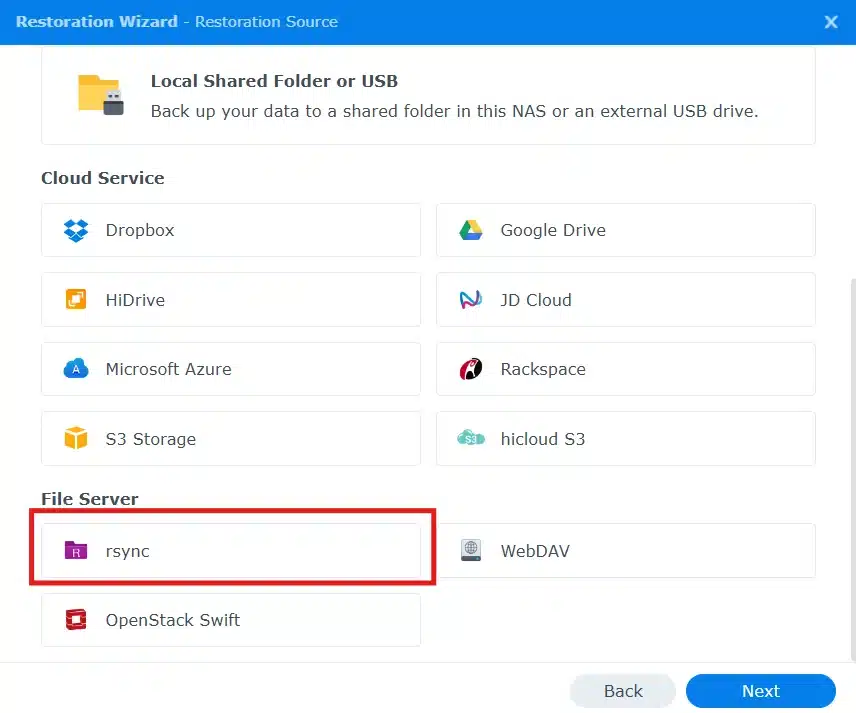
Choose Rsync server:
Here enter the information as previously mentioned in step 2:
Then continue the steps to choose what to restore.
Final checks
Run the first backup manually, review the task log, and restore a test file through Hyper Backup Explorer. A completed job is not enough evidence by itself—the backup is trustworthy only after you confirm that you can restore from it. Keep the Ubuntu destination patched, restrict the rsync account to the backup directory, and review retention periodically.