How to Back Up a QNAP NAS to Amazon S3 with HBS 3

This guide shows how to copy data from a QNAP NAS to Amazon S3 with HBS 3. You will create a private S3 bucket, give a dedicated IAM user limited access, connect HBS 3, schedule the transfer, and verify that files reach the bucket.
Important: the screenshots below use an HBS 3 one-way sync job. A sync copy is useful for off-site protection, but it is not automatically a versioned backup. Enable S3 Versioning or use an HBS 3 backup job with version management if you need to recover older or deleted files.
Why use Amazon S3 for a QNAP backup?
Amazon S3 provides durable off-site object storage without requiring a second NAS. It is a strong option when you need geographic separation and flexible capacity, although storage, requests, retrieval, and data-transfer charges make it more complex than an external drive.
Before you start
- Update QTS or QuTS hero and HBS 3.
- Choose the AWS Region closest to you or required by your data policy.
- Keep S3 Block Public Access enabled.
- Decide whether you will use S3 Versioning or an HBS 3 versioned backup job.
- Store the access key securely; never paste it into screenshots or public notes.
Set up QNAP HBS 3 with Amazon S3
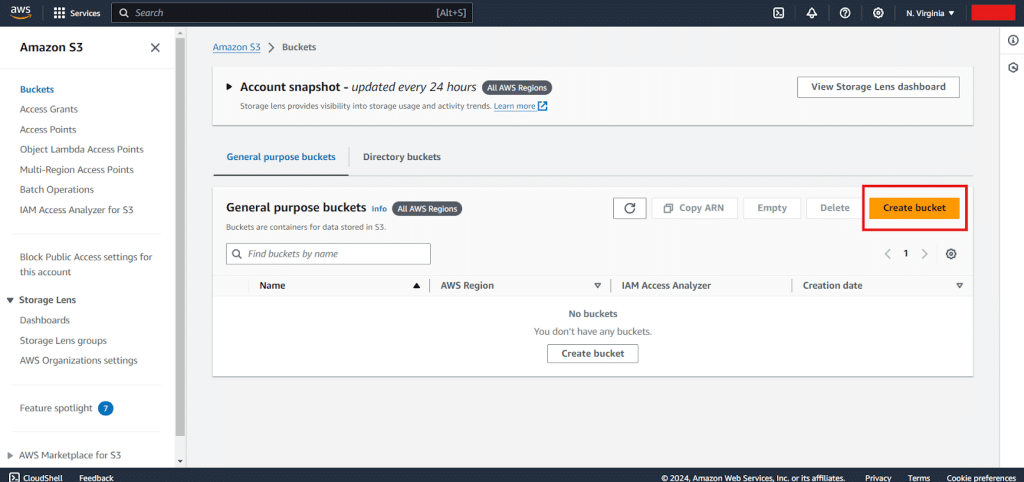
Step – 1 – Login to your AWS console and create a new S3 Bucket:
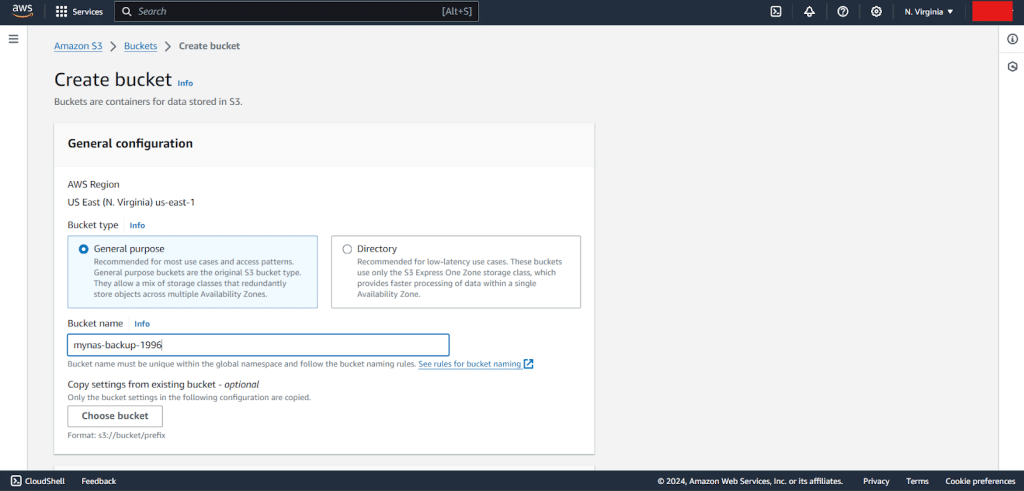
The S3 Bucket name should be globally unique, for this example it’s “mynas-backup-1996”
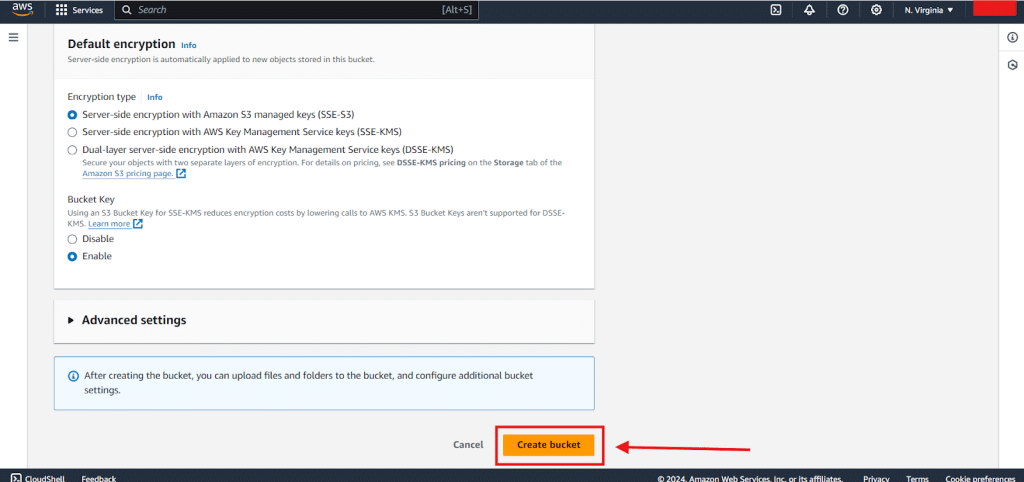
Scroll down, we have more configurations while creating S3 Bucket, like Versioning , Object Lock , and public access, etc…
In this example I will leave everything as default and choose “Create Bucket”:
Now after the bucket is created, we need to create an IAM user for HBS 3 to use to write files to the Bucket.
Step – 2 – create IAM user:
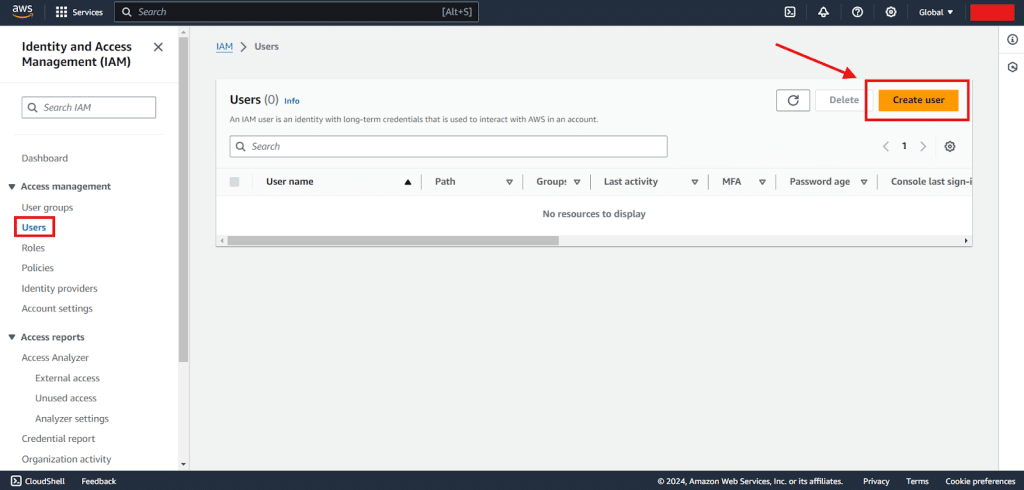
Head to IAM console then Users, and then create user:
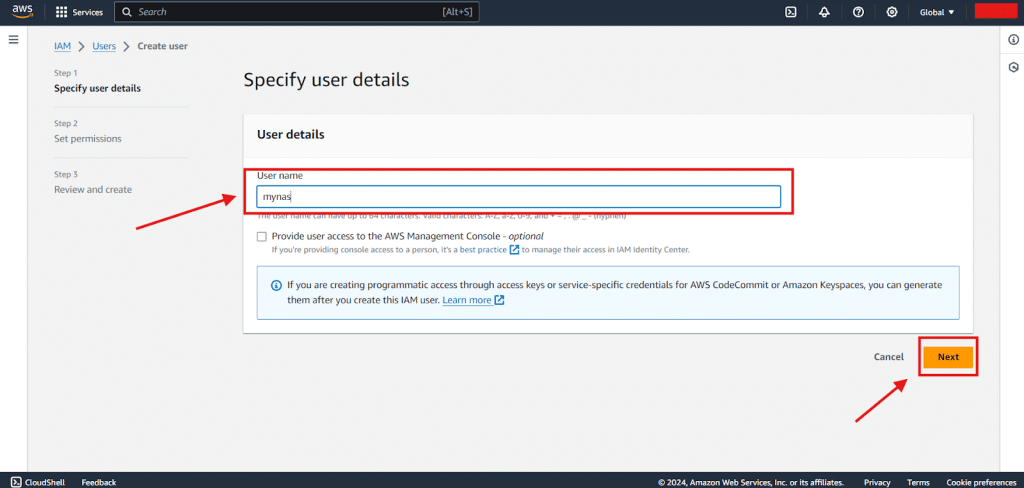
This user doesn’t need console access, so you can leave the option “Provide User access to the AWS Management Console “ unchecked, then click “Next”:
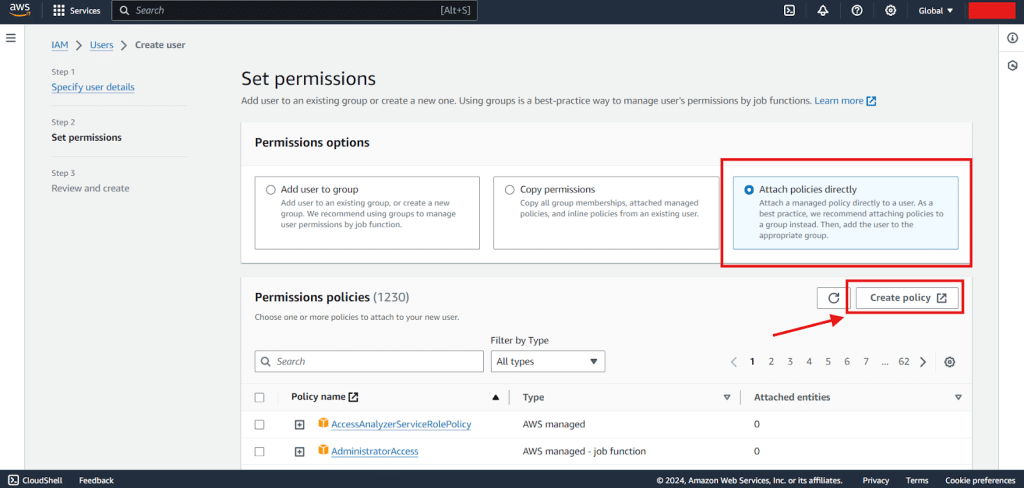
For permissions, I will create a custom Policy, because it’s better to stick to the “Principle of the Least Privilege”, which means we grant the user access only to specific data or actions that required to complete the task,
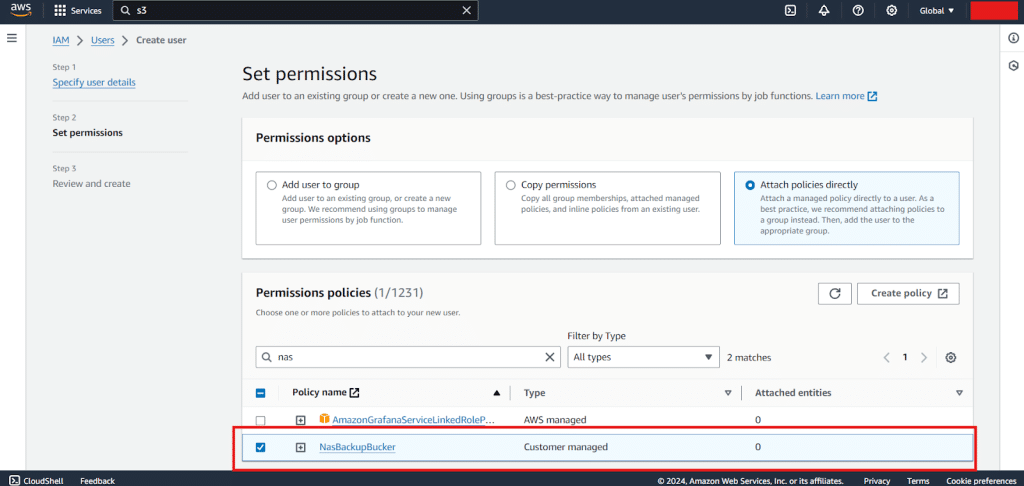
Now, on permissions page, choose “attach policy directly” , then “create policy”:
We will allow this user to make the actions (ListBucket, GetObject, DeleteObject, PutObject, ListAllMyBuckets, GetBucketLocation ) on this Bucket and the objects of this Bucket, it should look like this:
| { “Version”: “2012-10-17”, “Statement”: [ { “Sid”: “BucketLevel”, “Effect”: “Allow”, “Action”: [ “s3:ListBucket” ], “Resource”: [ “arn:aws:s3:::{Bucket Name}” ] }, { “Sid”: “ObjectLevel”, “Effect”: “Allow”, “Action”: [ “s3:PutObject”, “s3:GetObject”, “s3:DeleteObject” ], “Resource”: [ “arn:aws:s3:::{Bucket Name}/*” ] }, { “Sid”: “ListAndGetBucketLocation”, “Effect”: “Allow”, “Action”: [ “s3:ListAllMyBuckets”, “s3:GetBucketLocation” ], “Resource”: [ “*” ] } ] } |
for more information about IAM policies, check AWS Documentation
In order to make this, when you click on “create policy” it will open the policy editor, choose JSON and paste the above policy in the policy editor
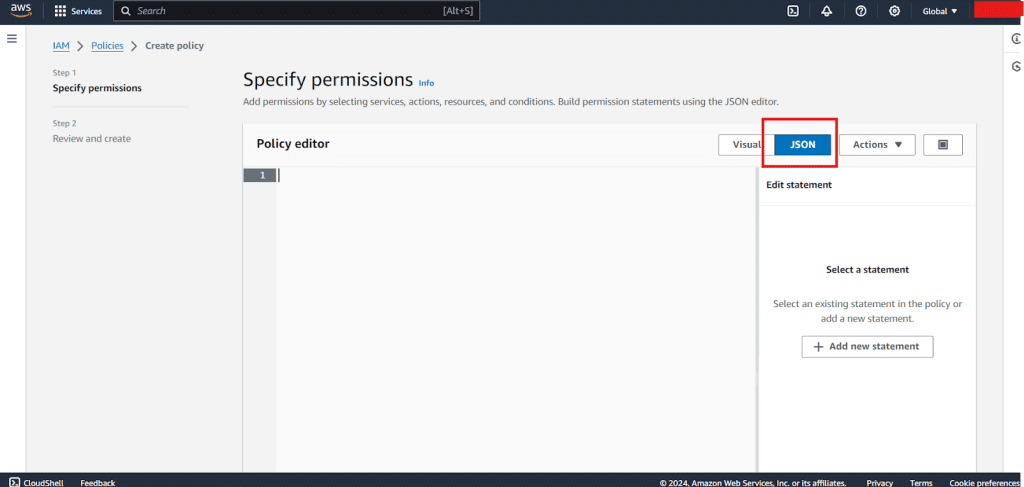
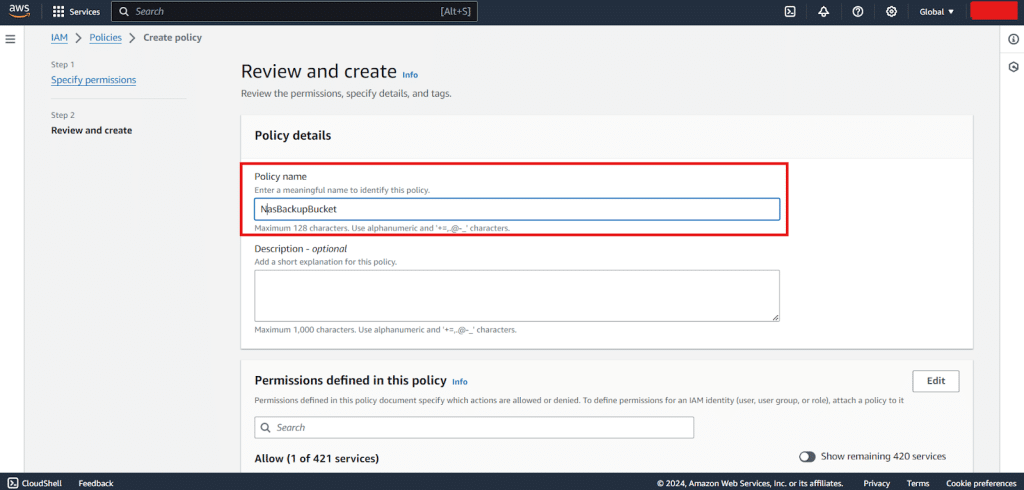
After this, click “Next”, then give the policy a name, then, scroll down and click “ Create Policy”:
Once the policy created, we can attach it to the user:
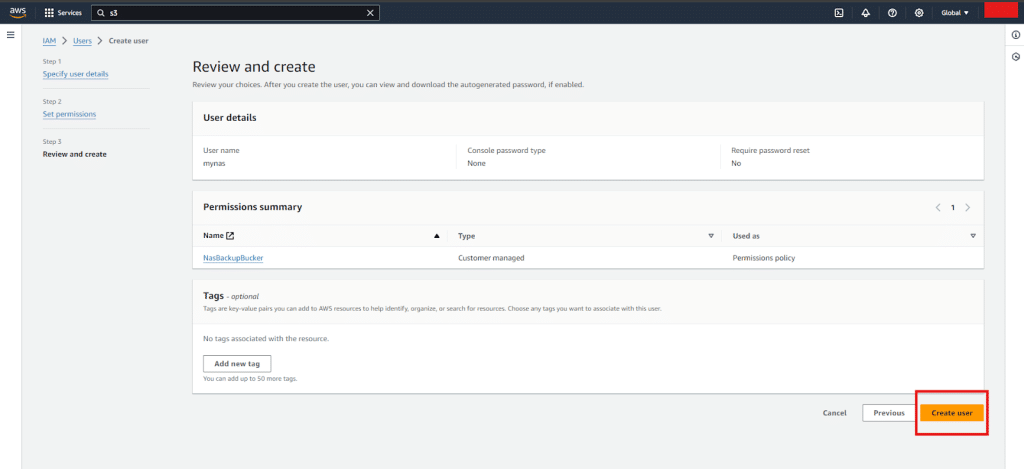
Then, click “Next” and review then “Create User”:
Step – 3 – Create Access Key for the IAM User:
On the IAM Console, go to the users section and click on the username that you created:
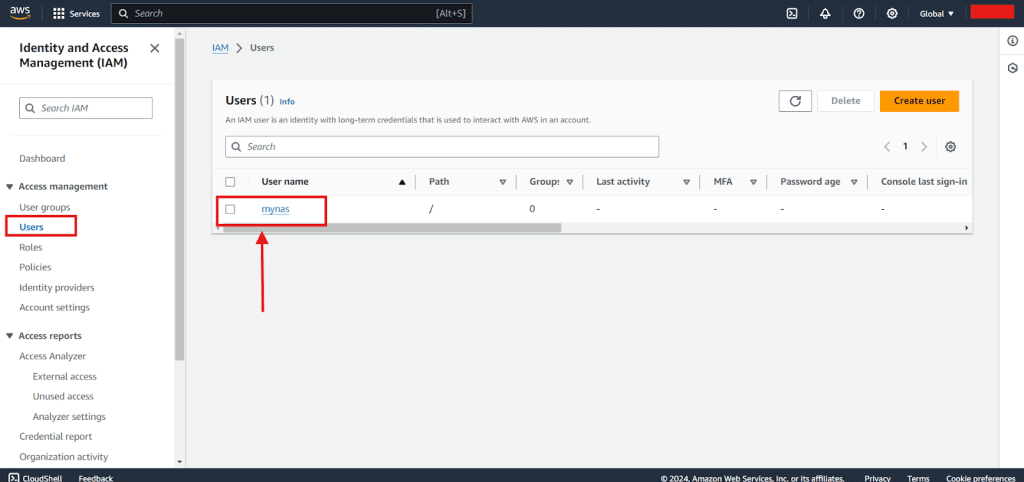
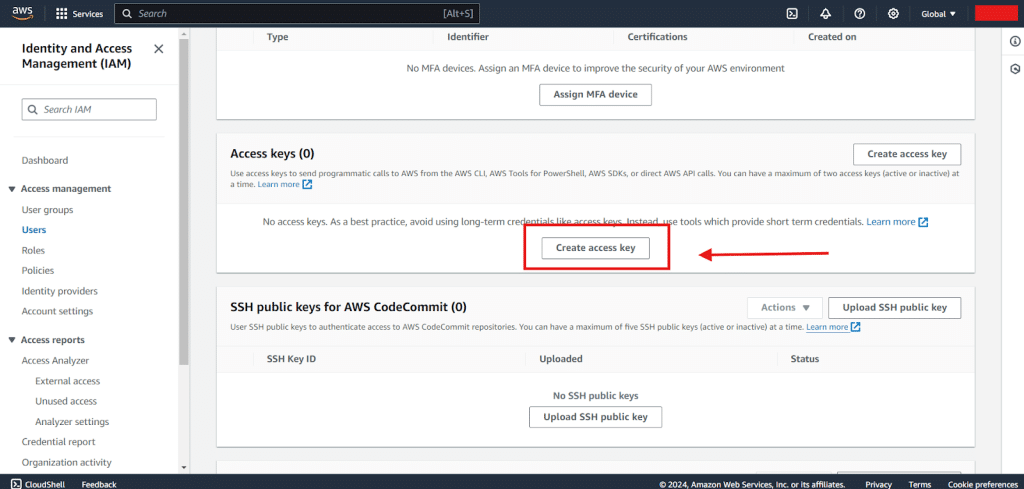
Then go to the “ Security Credentials “ tab, and scroll down to “Access keys” , then click on “create access key” button:
The options should be as follows :
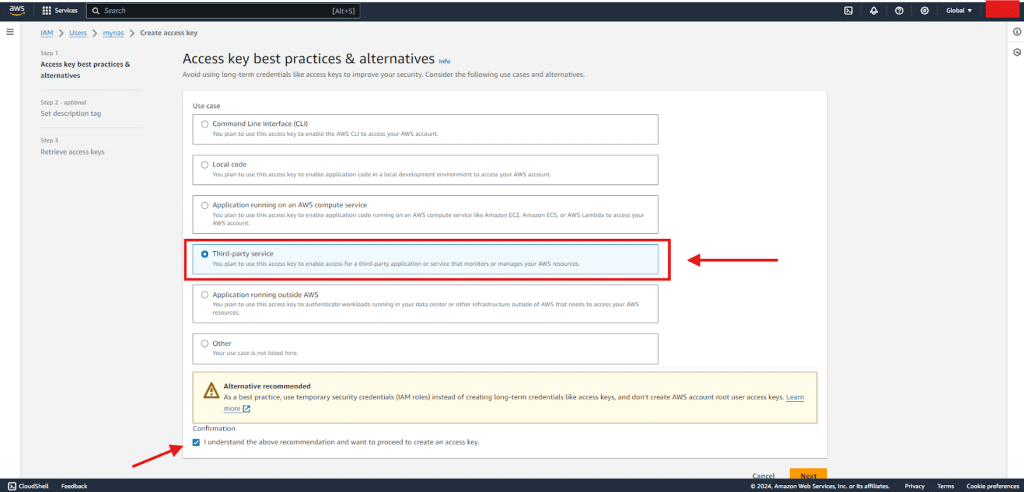
Then click “Next”
Optionally, you can add tags to describe the access key, then “create access key”
Once created, you can download the access key id & the access key as a csv file, make sure to save it.
Step – 4 – Log in to your QNAP NAS and Create HBS 3 Sync Job:
Open HBS 3 Program:
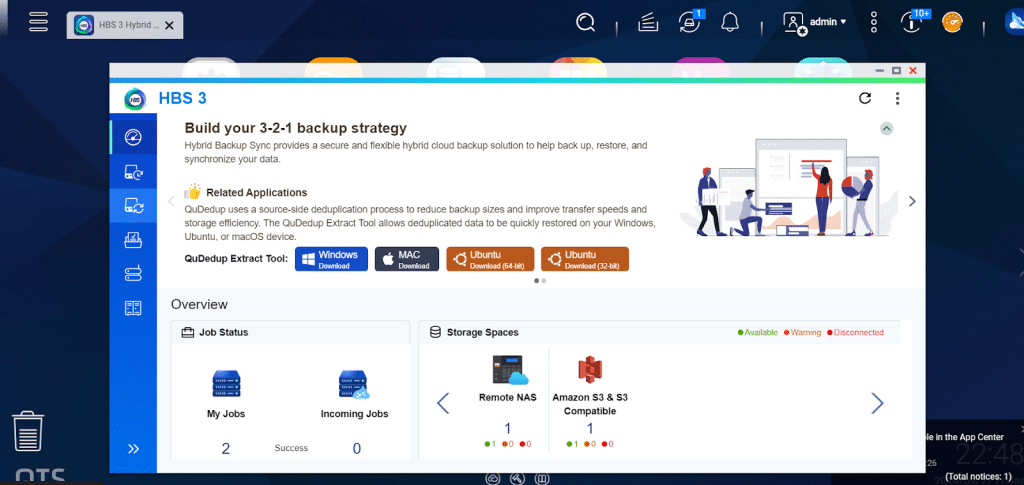
Then head to Sync Section and Create a “One-Way Sync Job”:
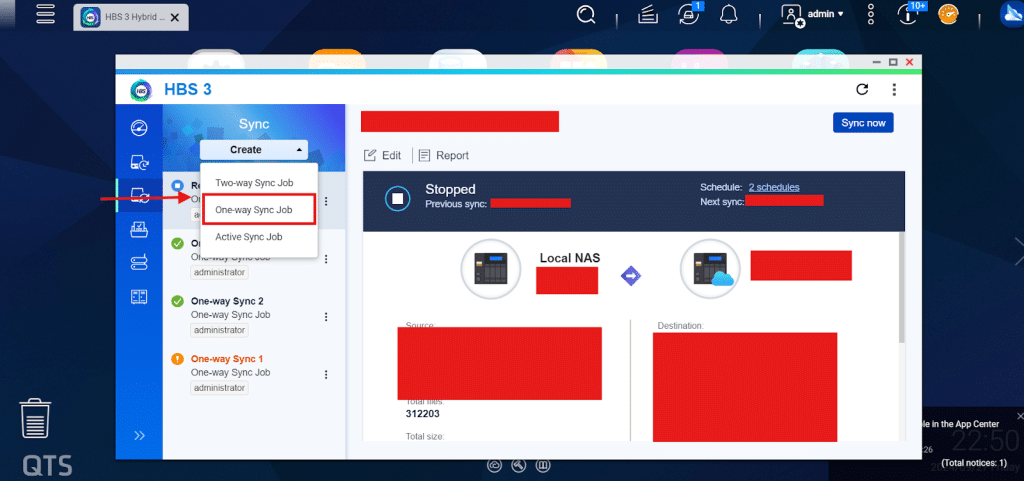
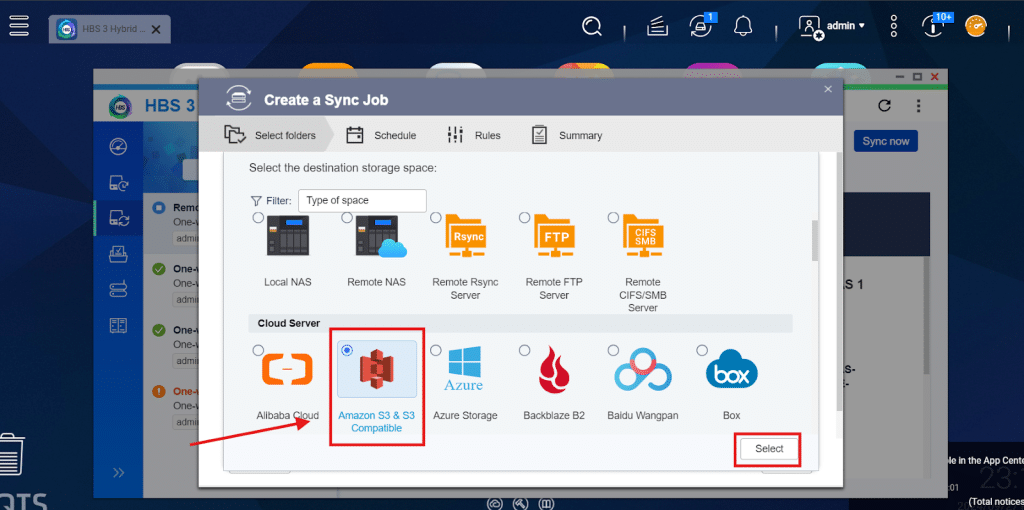
Now choose the destination as “ Amazon S3 & S3 Compatible” :
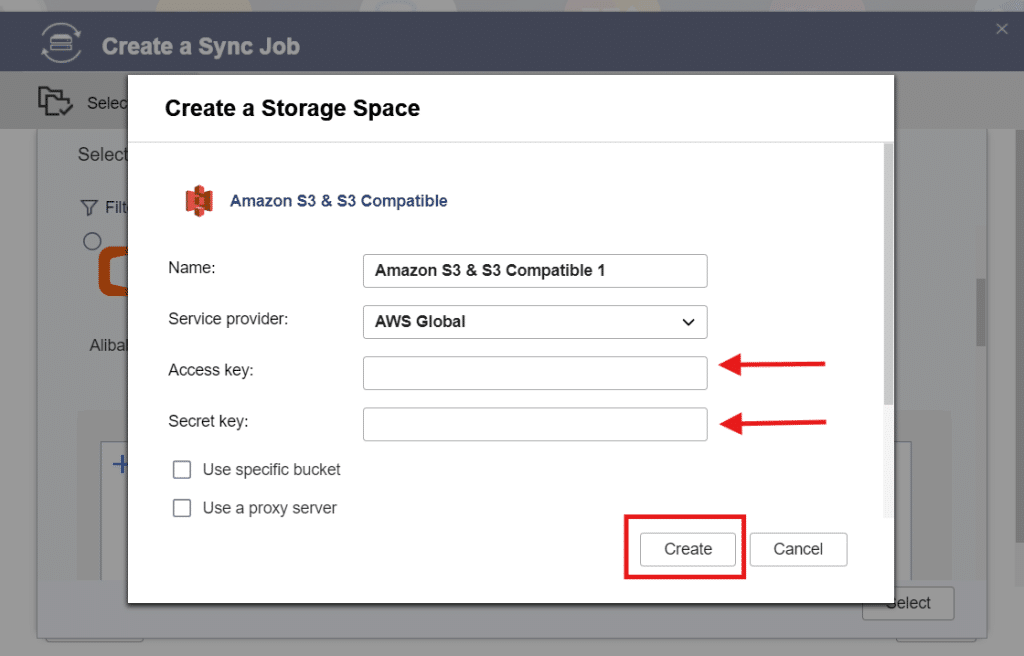
Then, copy and paste the Access Key id & Secret Access Key from the csv file downloaded earlier to their fields respectively, then click “Create”:
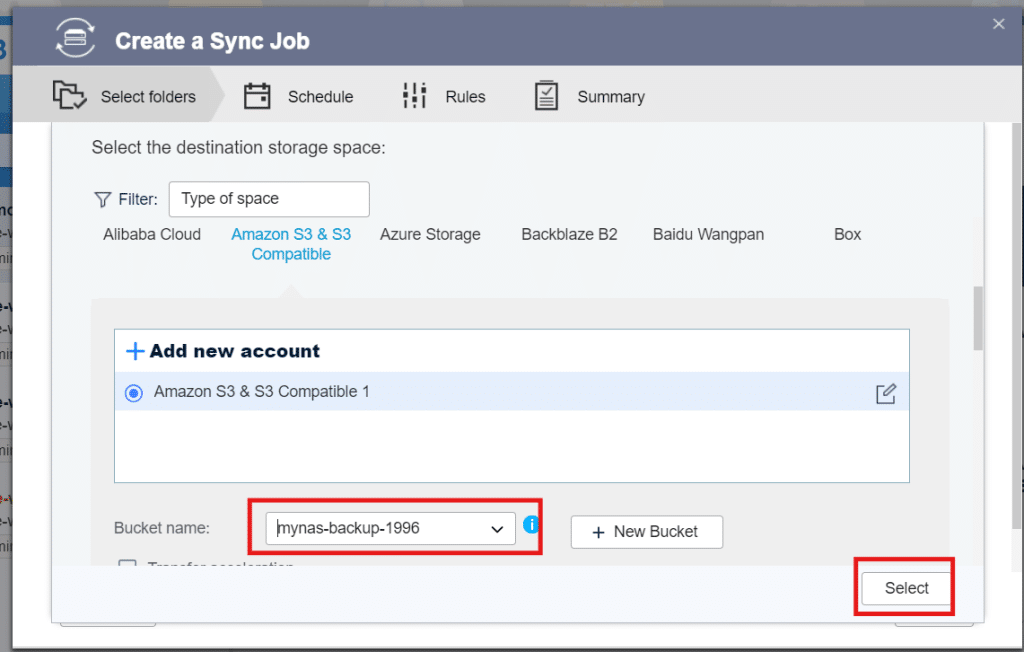
If the permissions are assigned correctly, then the creating should be successful and you can choose the bucket name from the drop-down menu:
Now choose the Source folder from your Local NAS and the destination folder in the S3 Bucket:
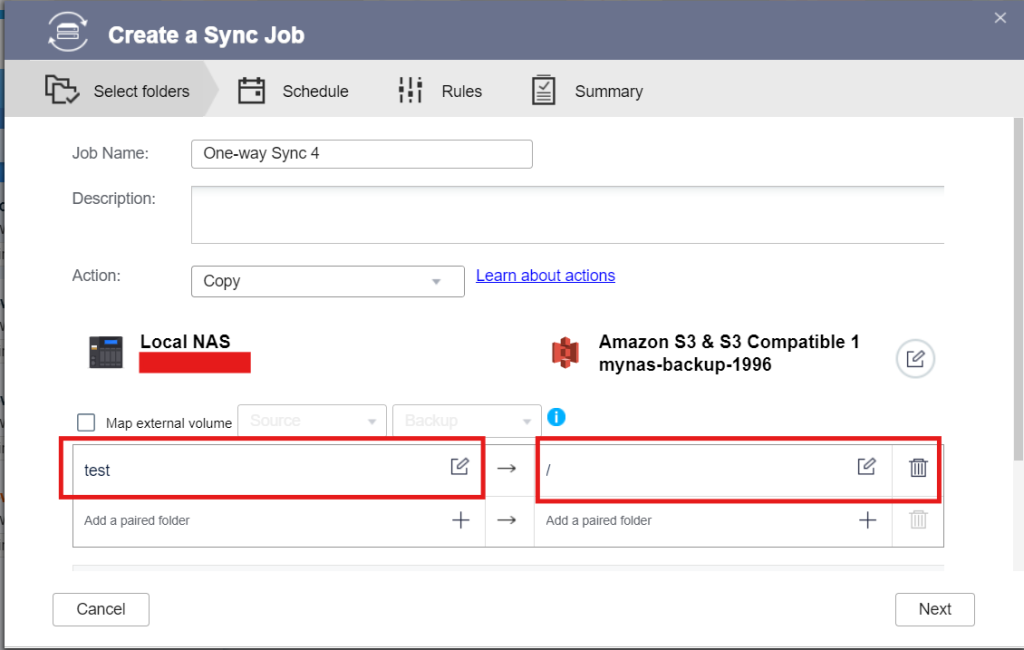
* you can add multiple folders to map to S3 up to 16 folders per Job.
Now, you can schedule the Sync Job however you see fit:
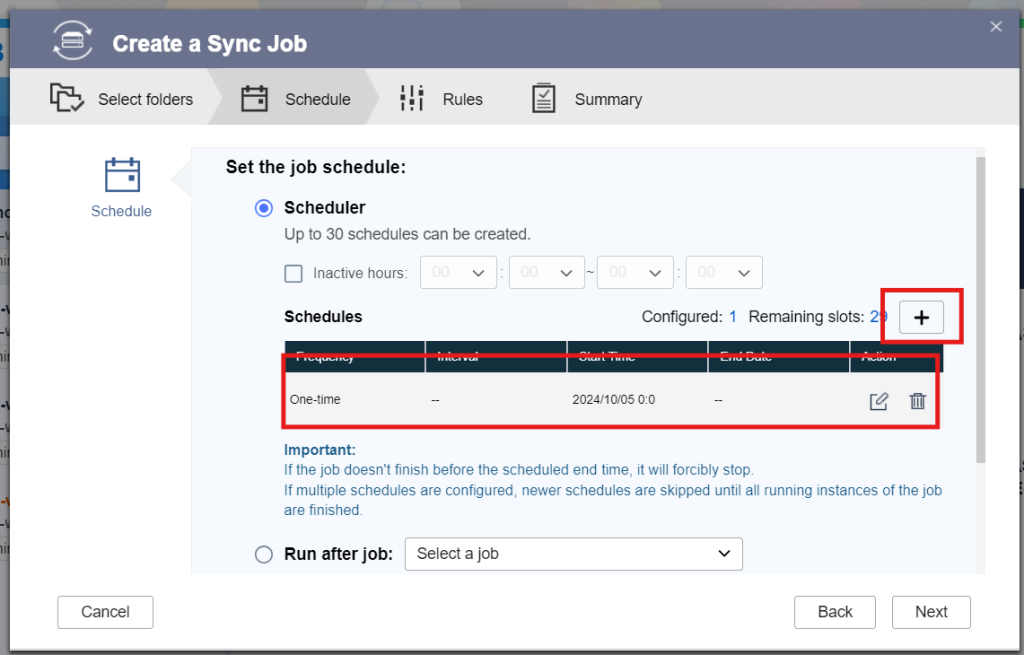
For the Rules, I will leave everything as default, but feel free to discover the available options:
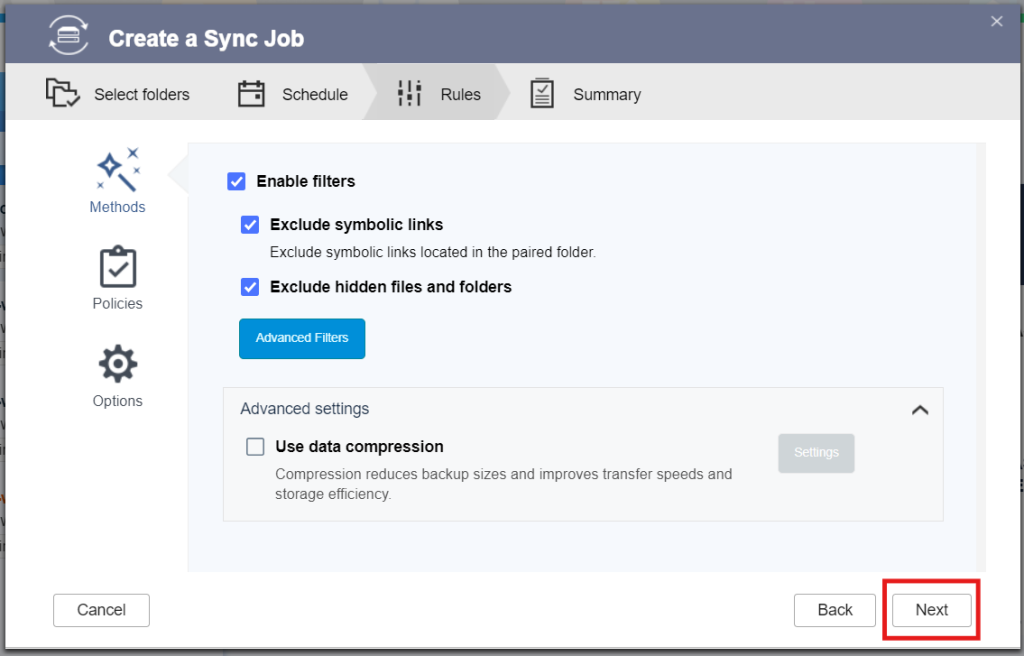
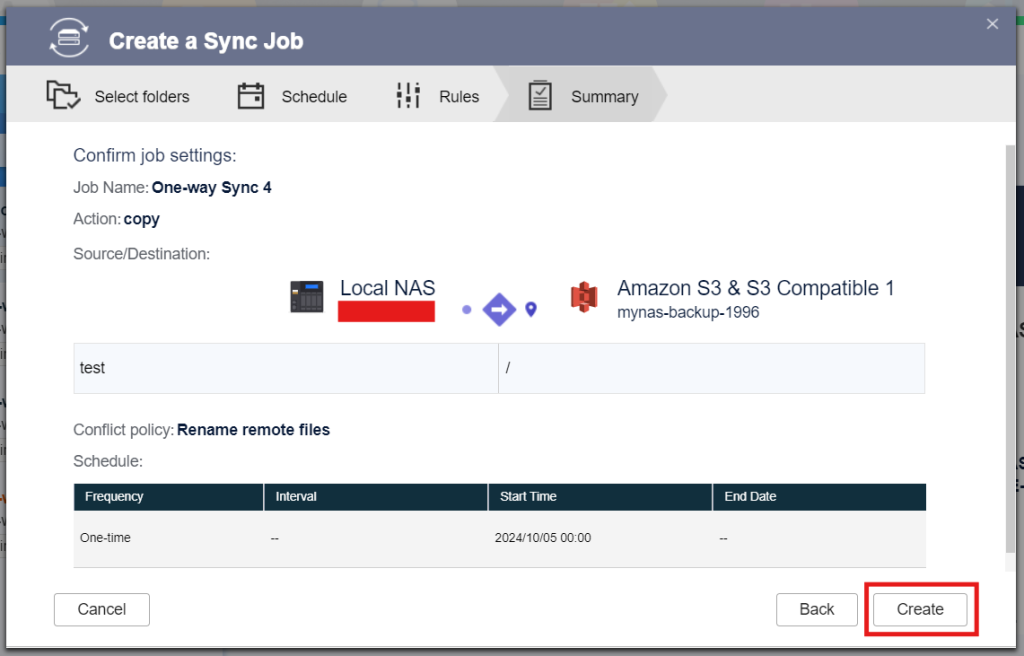
Review and Create:
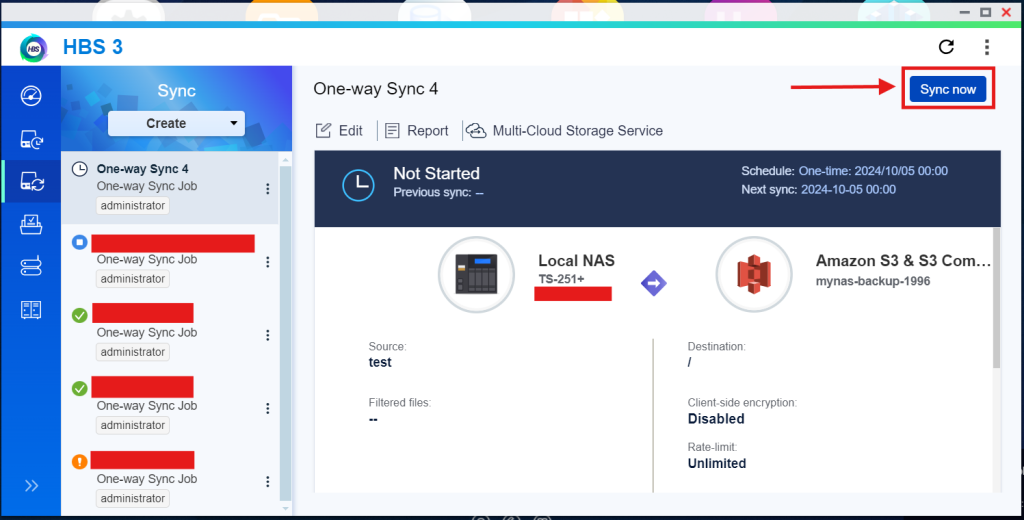
Step – 5 – Start the Sync and verify:
Click on “Sync Now”, to test the Sync job
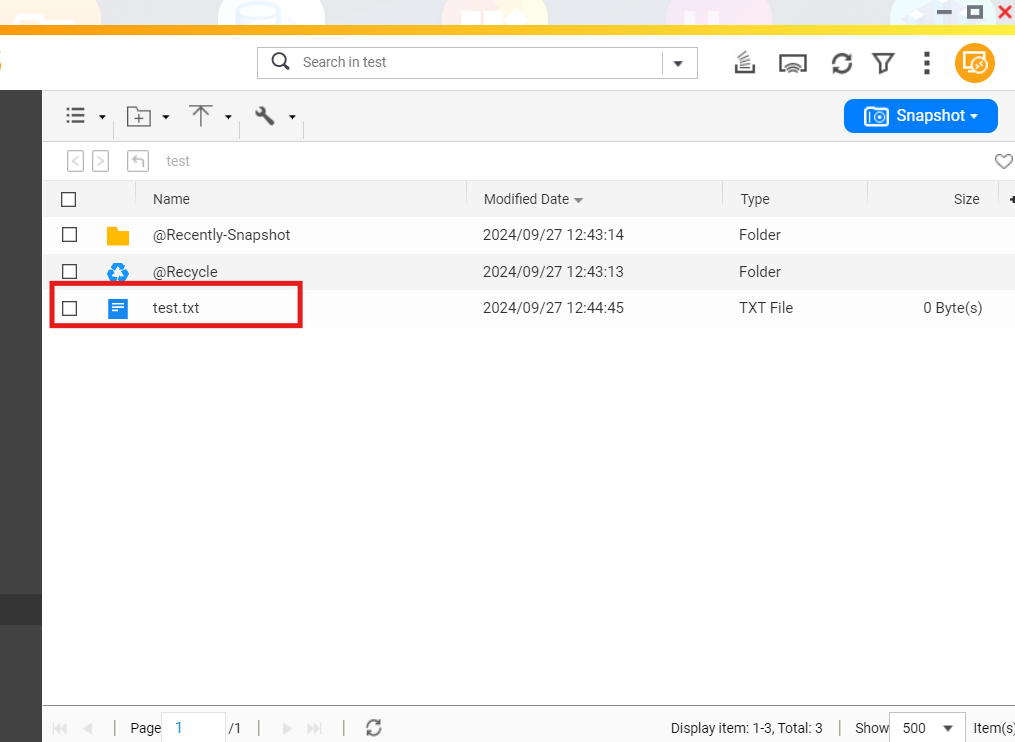
I have a test.txt file inside the mapped folder:
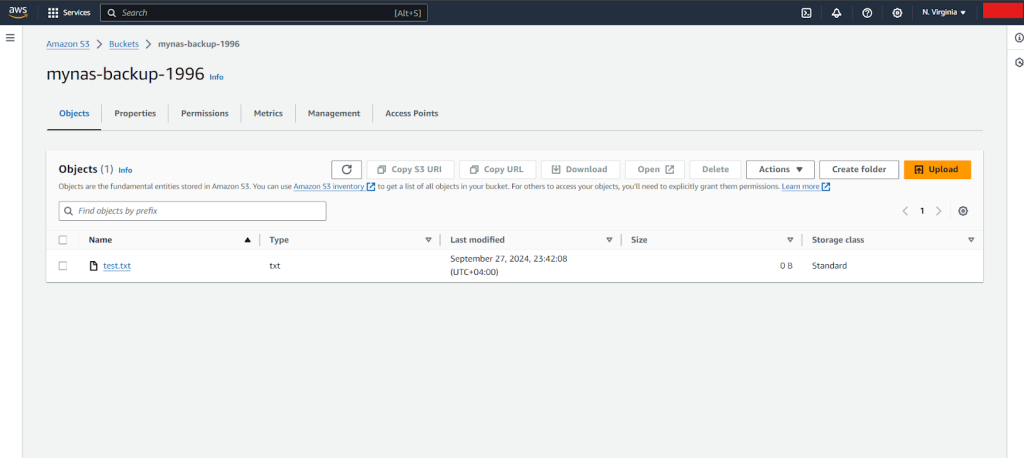
Now we can see that the file has been copied to the S3 Bucket:
Before you rely on this copy
- Run the job once and confirm it finishes without warnings.
- Restore a small test folder to a different location on the NAS.
- Configure notifications so failed jobs are visible.
- Review S3 lifecycle rules carefully; premature transitions can add retrieval costs.
- Rotate the IAM access key and remove unused credentials.
For a lower-cost local copy, follow the QNAP external-drive guide. You can also compare the workflow with the Synology Amazon S3 guide.
Conclusion
Backup data to Amazon S3 gives you scalability and durability, with its lifecycle policies, you can move your data to more cost effective tiers, however, for smaller businesses or personal data, it might be complex and costly, and it’s a good idea to backup your data to an External Hard drive.
Check out this guide how to backup your QNAP NAS to an external hard drive.